The Indiana Public Safety Portal is the one-stop resource to apply for or manage permits and licenses administered by the Indiana Department of Homeland Security. The online system helps fulfill the state's goal to modernize and offer better customer service to Hoosiers.
To create an account, go to https://publicsafety.dhs.in.gov, click Register and then follow instructions to create an account via Access Indiana. After creating an account, owners of a regulated device, such as an elevator or boiler, should also register the device(s) in the system.
Note: Please use browsers Chrome or Edge to access the Public Safety Portal; other browsers may experience issues.
Video Tutorials
Step-by-Step Tutorials
- How to Close a Violation
Making physical corrections to a device itself does not close a violation. Device owners must also notify the appropriate IDHS Section of the fix before the comply-by date. After 30 days, violations become eligible to be sanctioned and fines will be enforced.
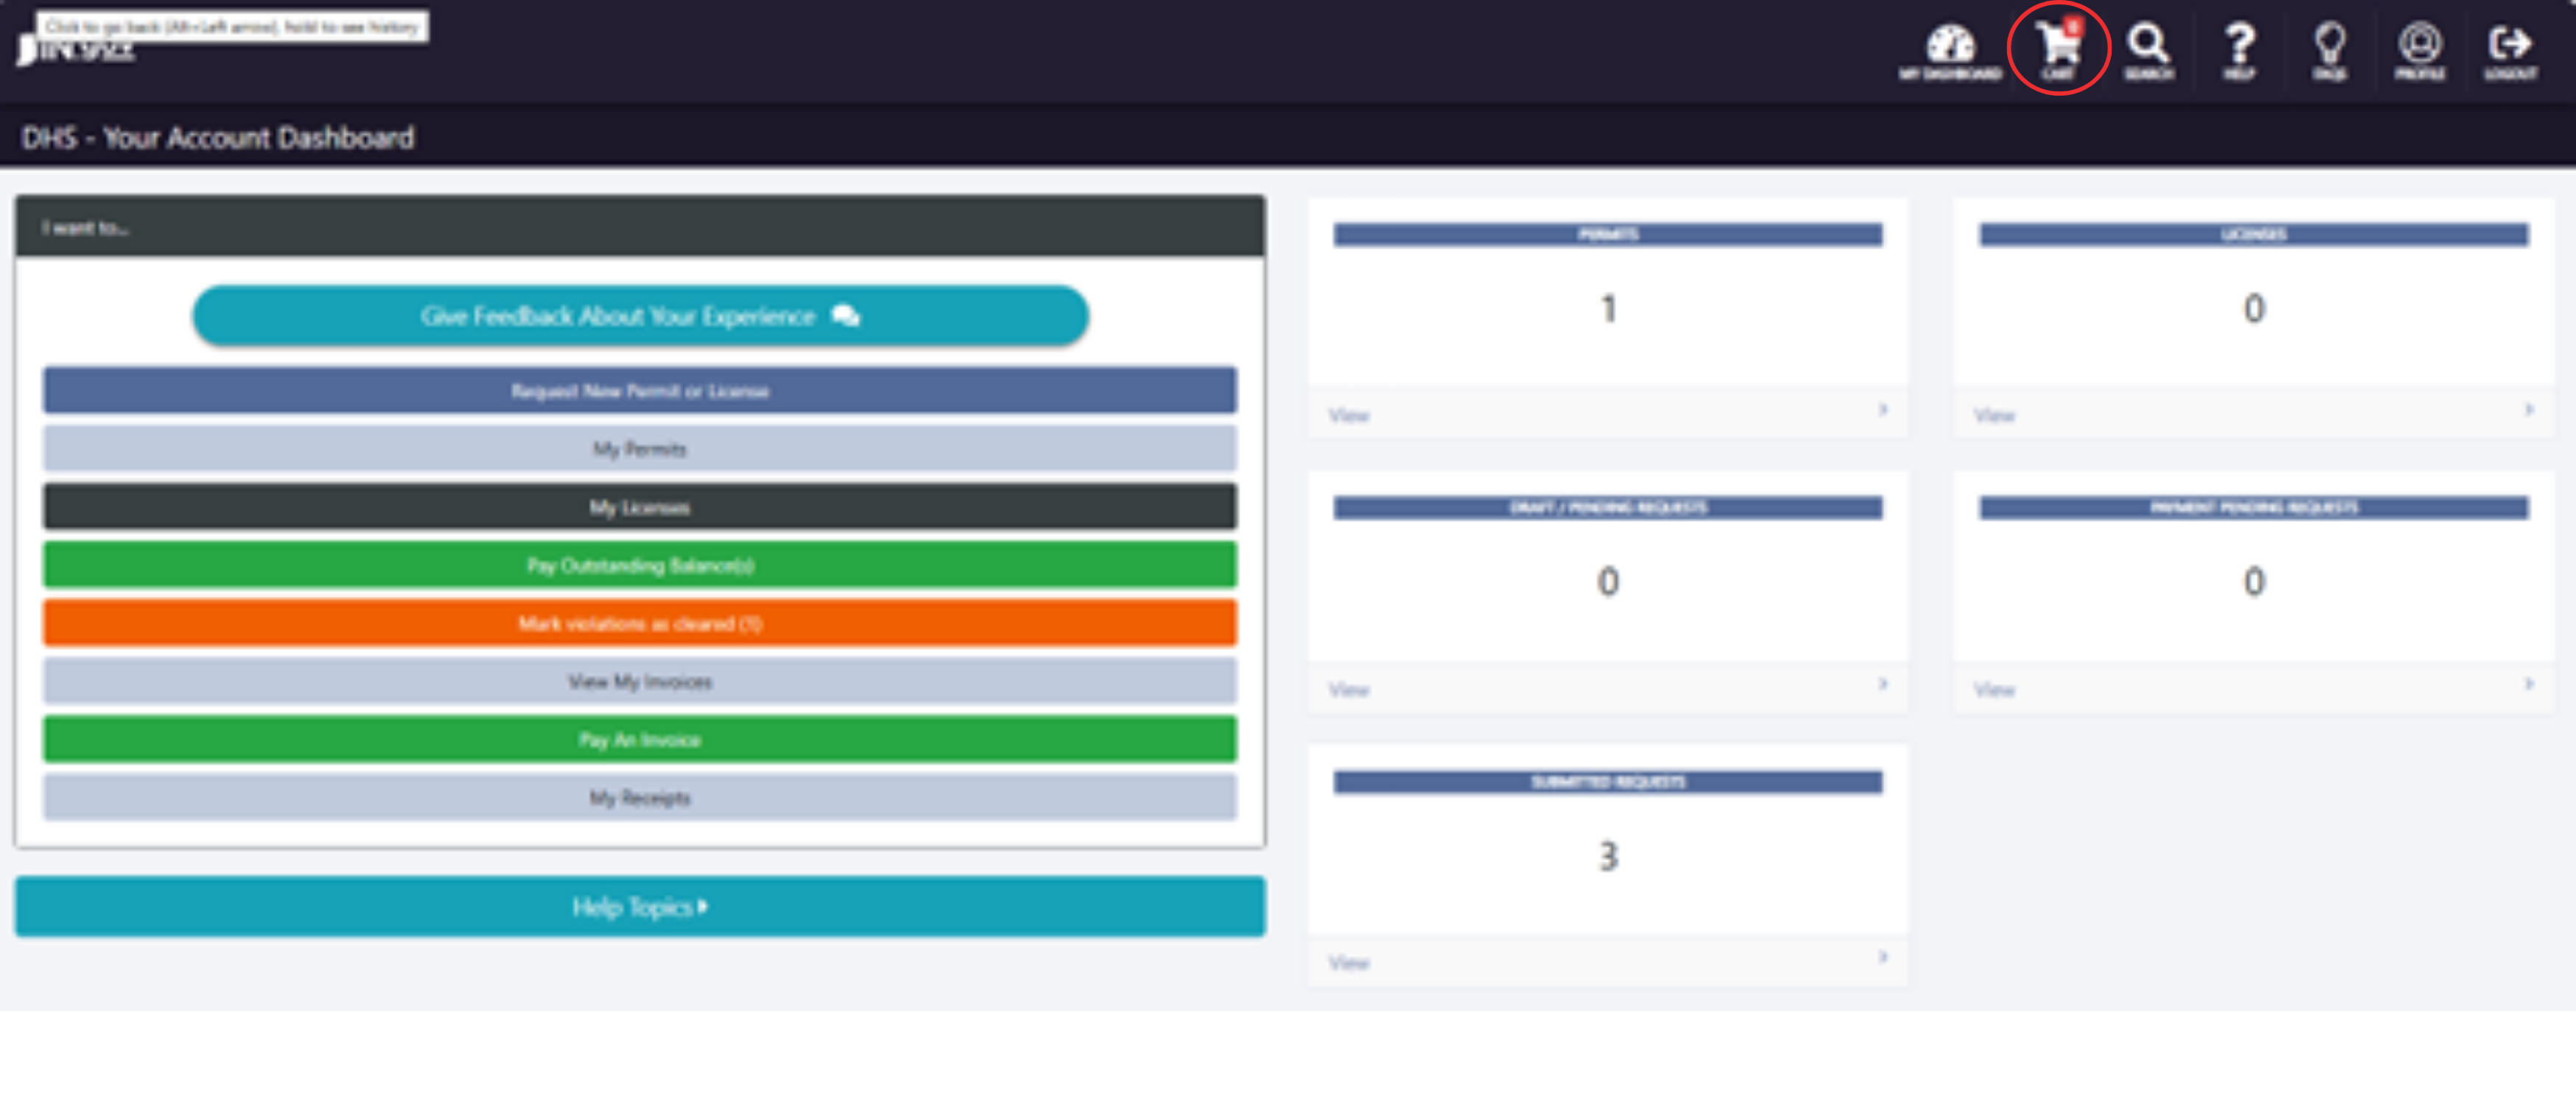
- Go to your account dashboard in the Public Safety Portal. If in violation, an orange Mark violations as cleared
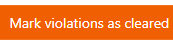 button will appear in the "I want to..." section on the left side of the dashboard. Note: This will only appear if there is an open violation in the system.
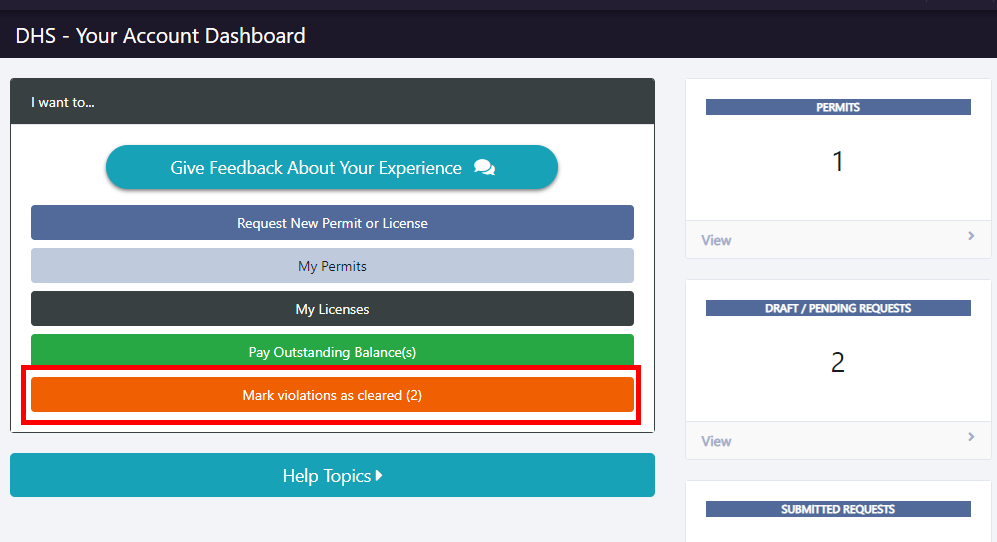
- After a violation has been physically corrected, click the Mark violations as cleared button.
- Click the green View
 button on the right side of the non-compliant device.
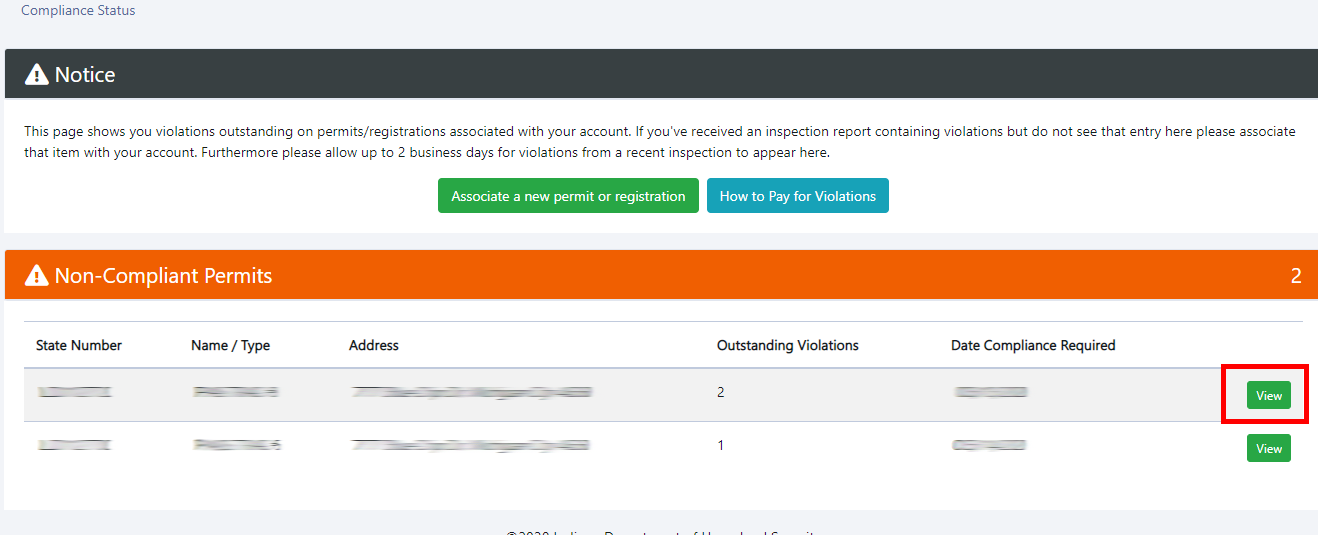
- Mark the Mark Resolved
 checkbox to confirm the correction of the violation has been made.
- At the bottom of the screen, enter your email address and electronic signature, and then click the green Agree & Submit
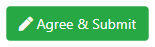 button at the right. This is legally binding, by signing this you are affirming the violation has been resolved. Please note if the violation is not resolved and an audit confirms this was falsely signed, the State of Indiana may take legal action. Expired permits are the exception you have to clear out the violation before you can make a payment and renew the permit please go ahead and do so.
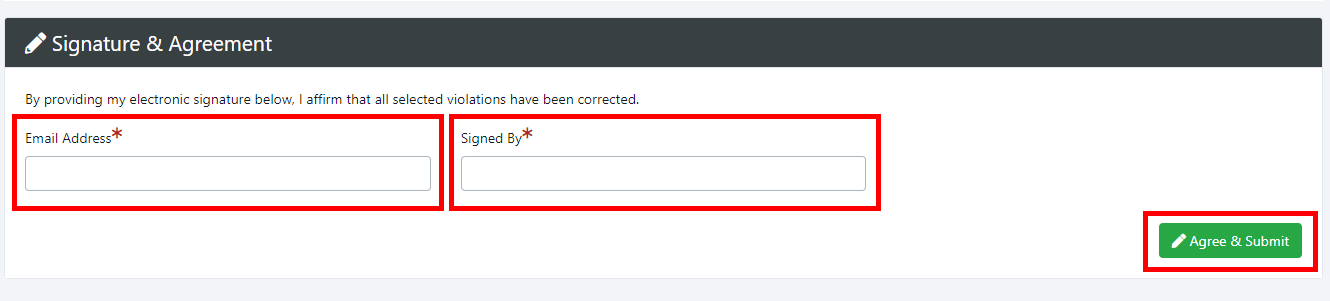
- The dashboard will update to remove the violation. If any violations remain, repeat the process until all are cleared.
- The dashboard will update to remove the violation. If any violations remain, repeat the process until all are cleared.
- Go to your account dashboard in the Public Safety Portal. If in violation, an orange Mark violations as cleared
- How to Add a Device
Step 1: Create an account – Note: If your business has a general email it is recommended to set up an account under that. If you use a specific person’s e-mail and they leave the company you may longer have access to that e-mail, a new portal will need to be created and all devices will need to be added again.
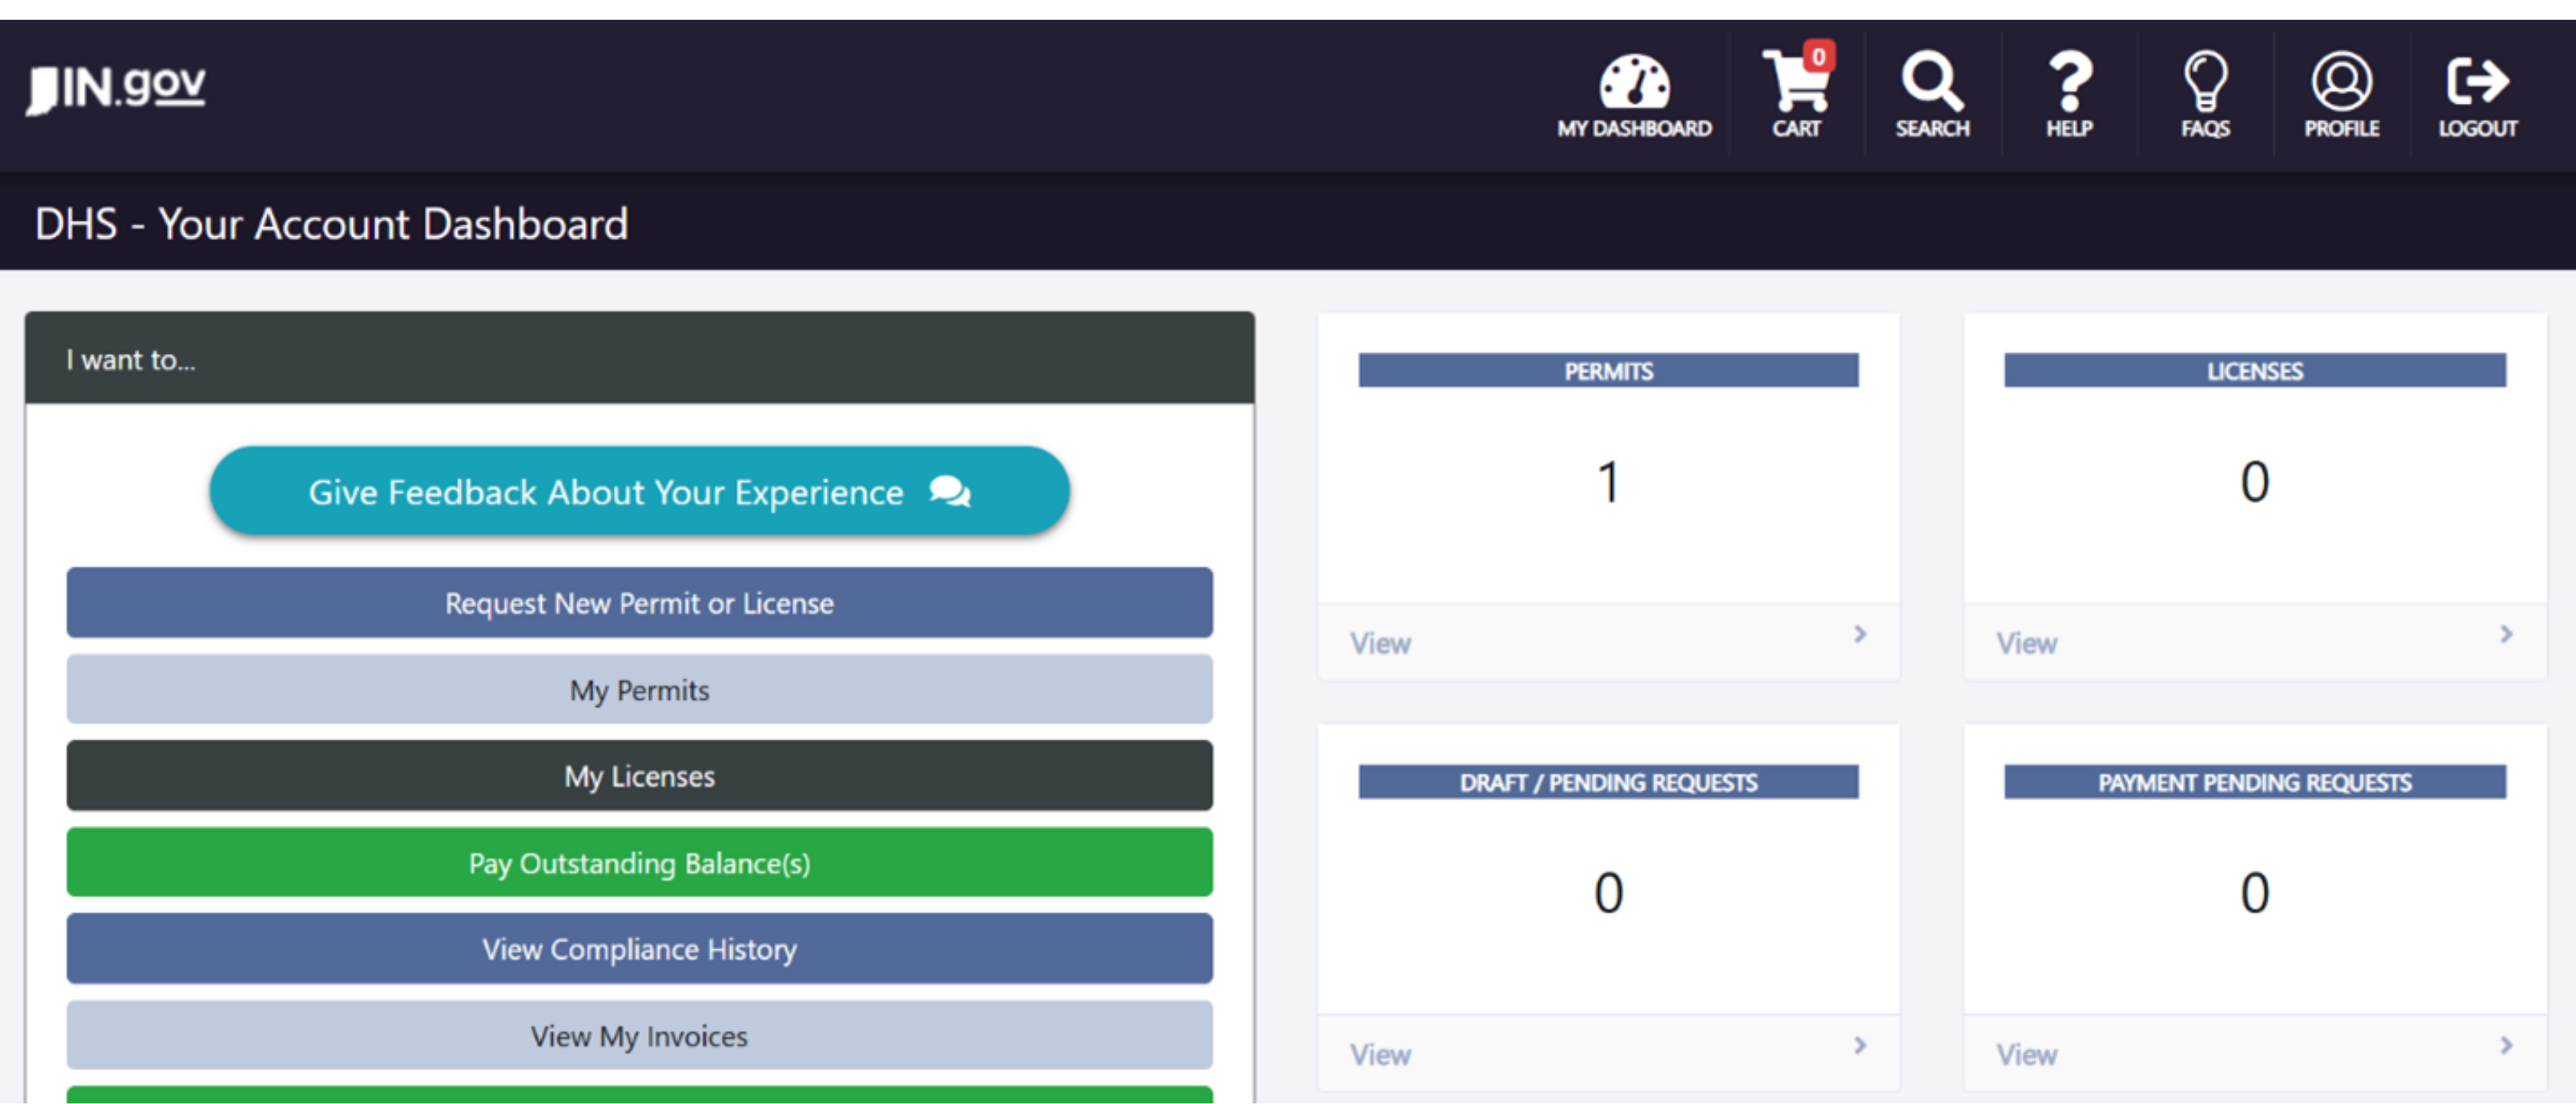
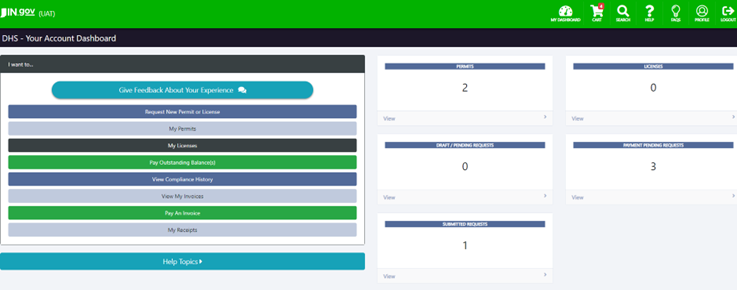
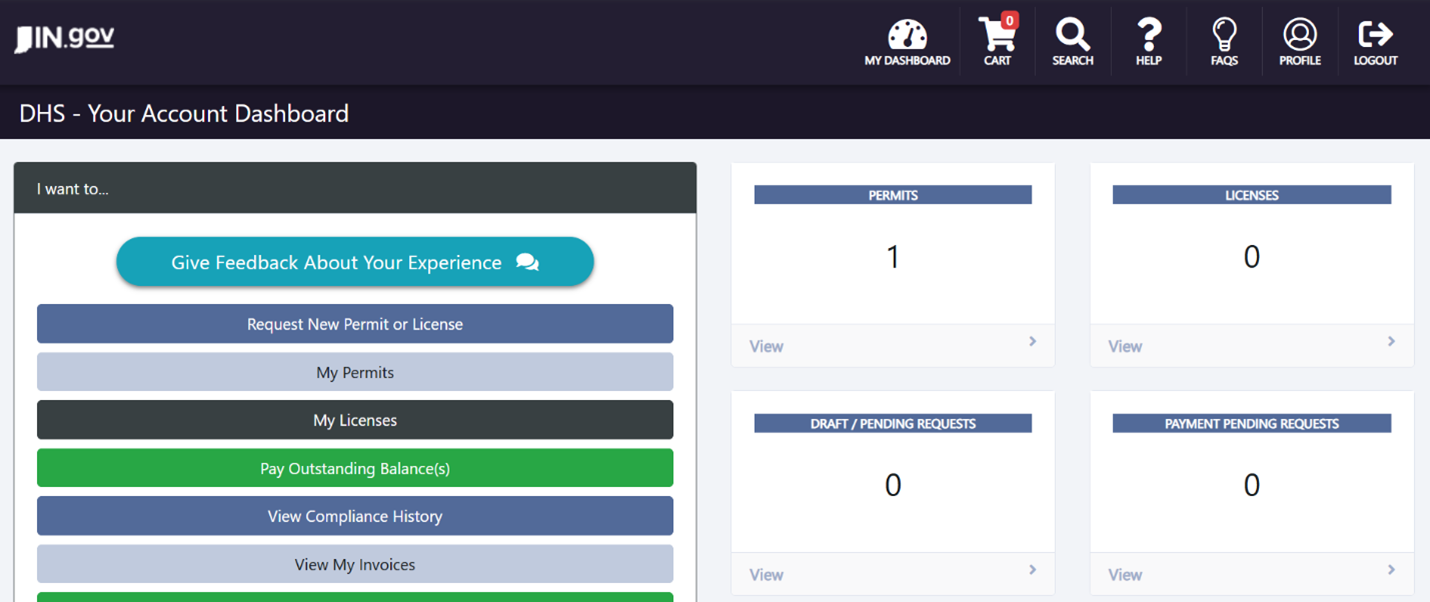
Step 2: Login - This will take you to the main dashboard page pictured below
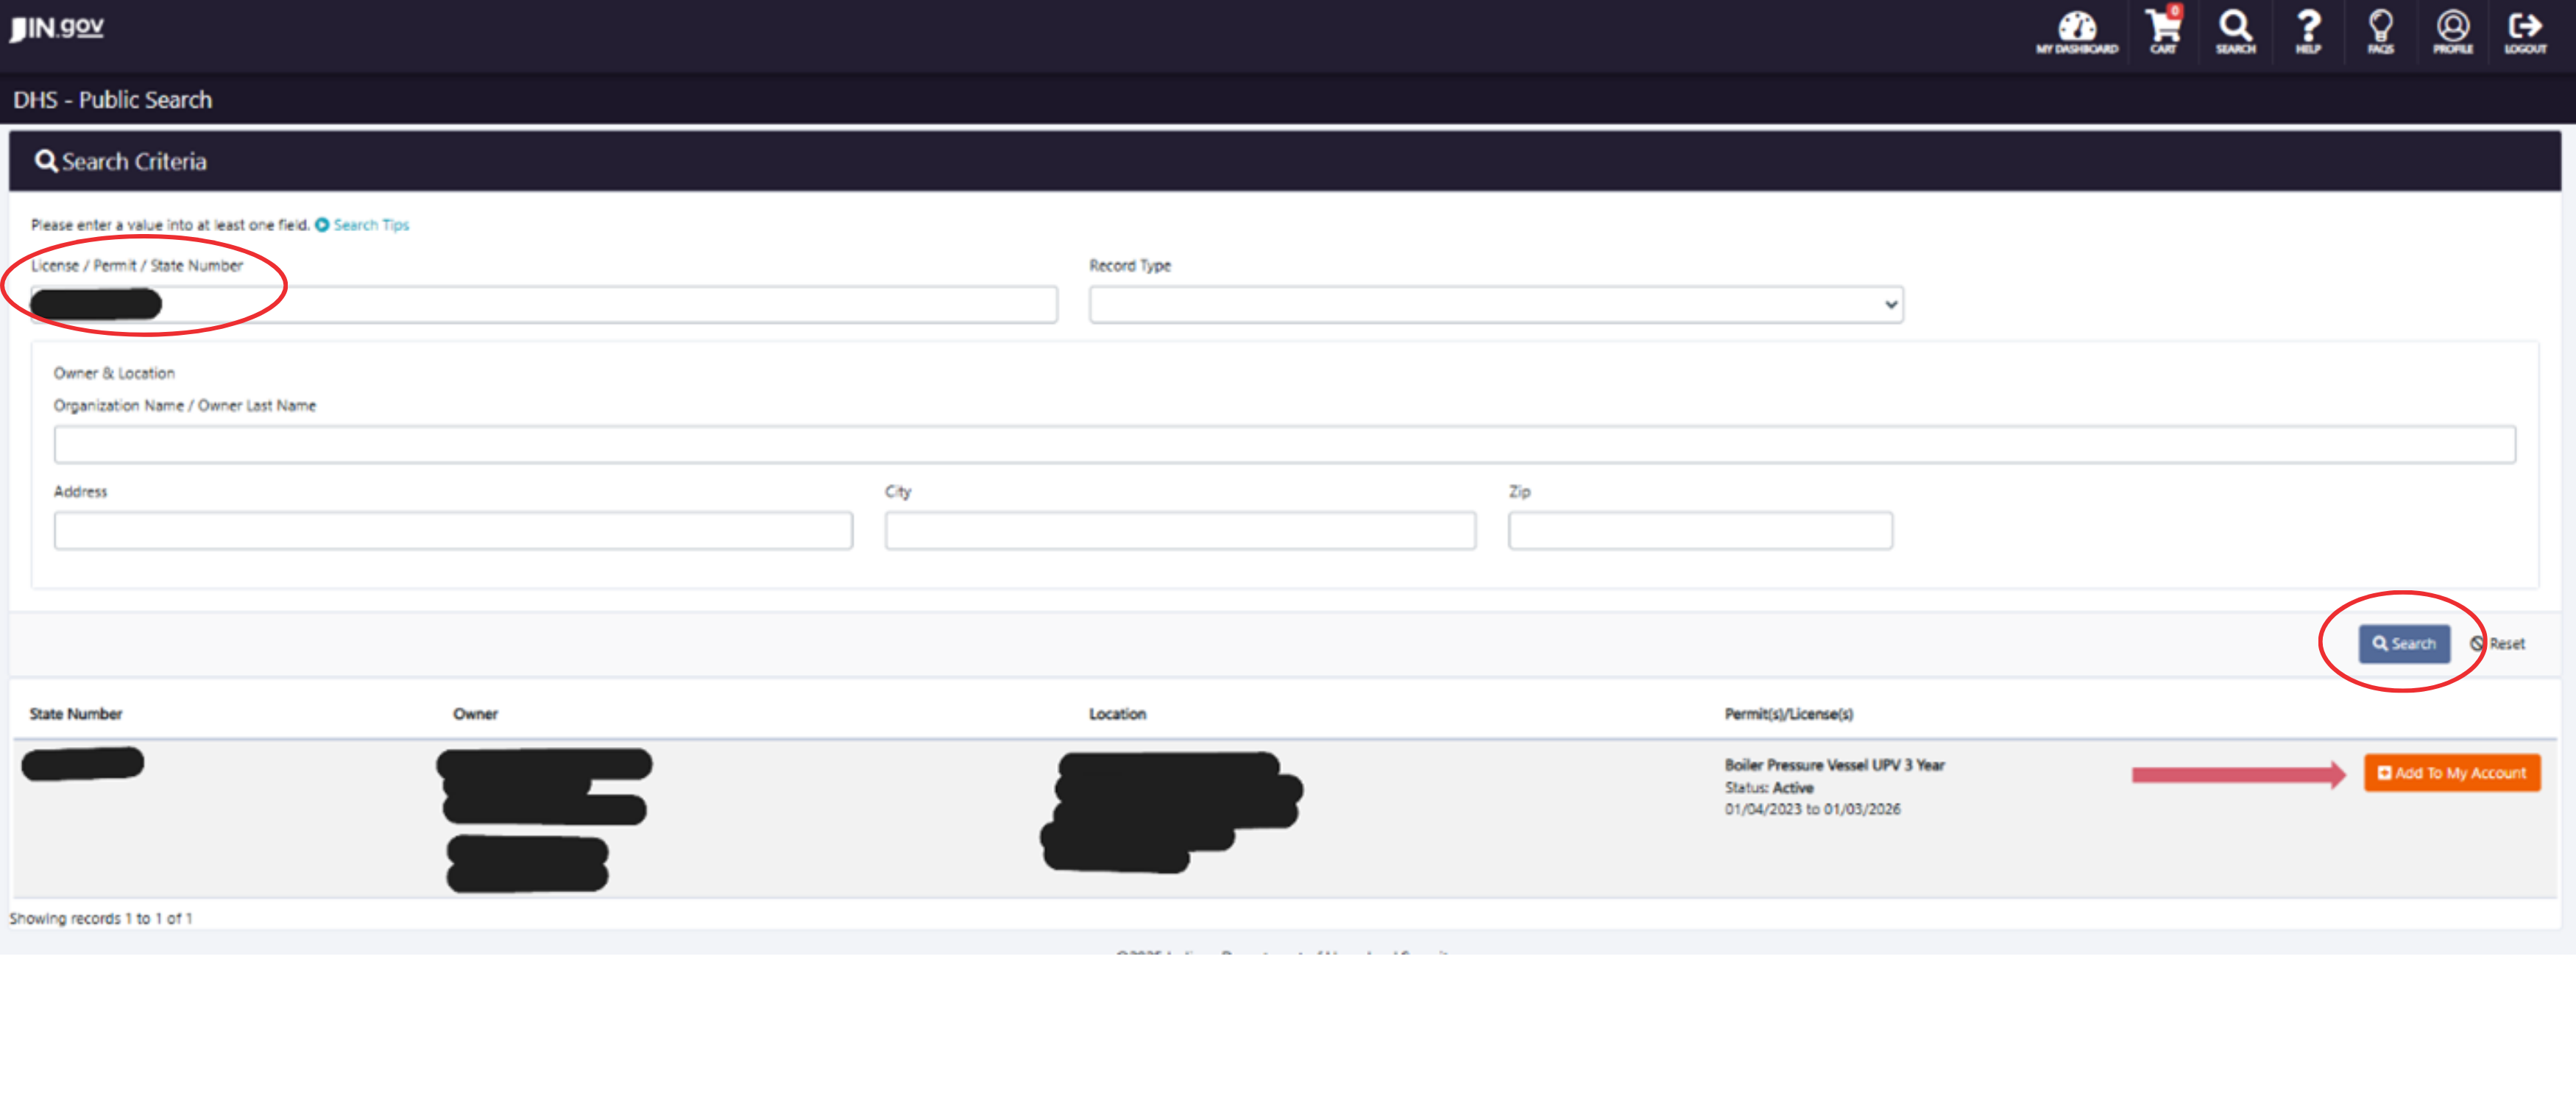
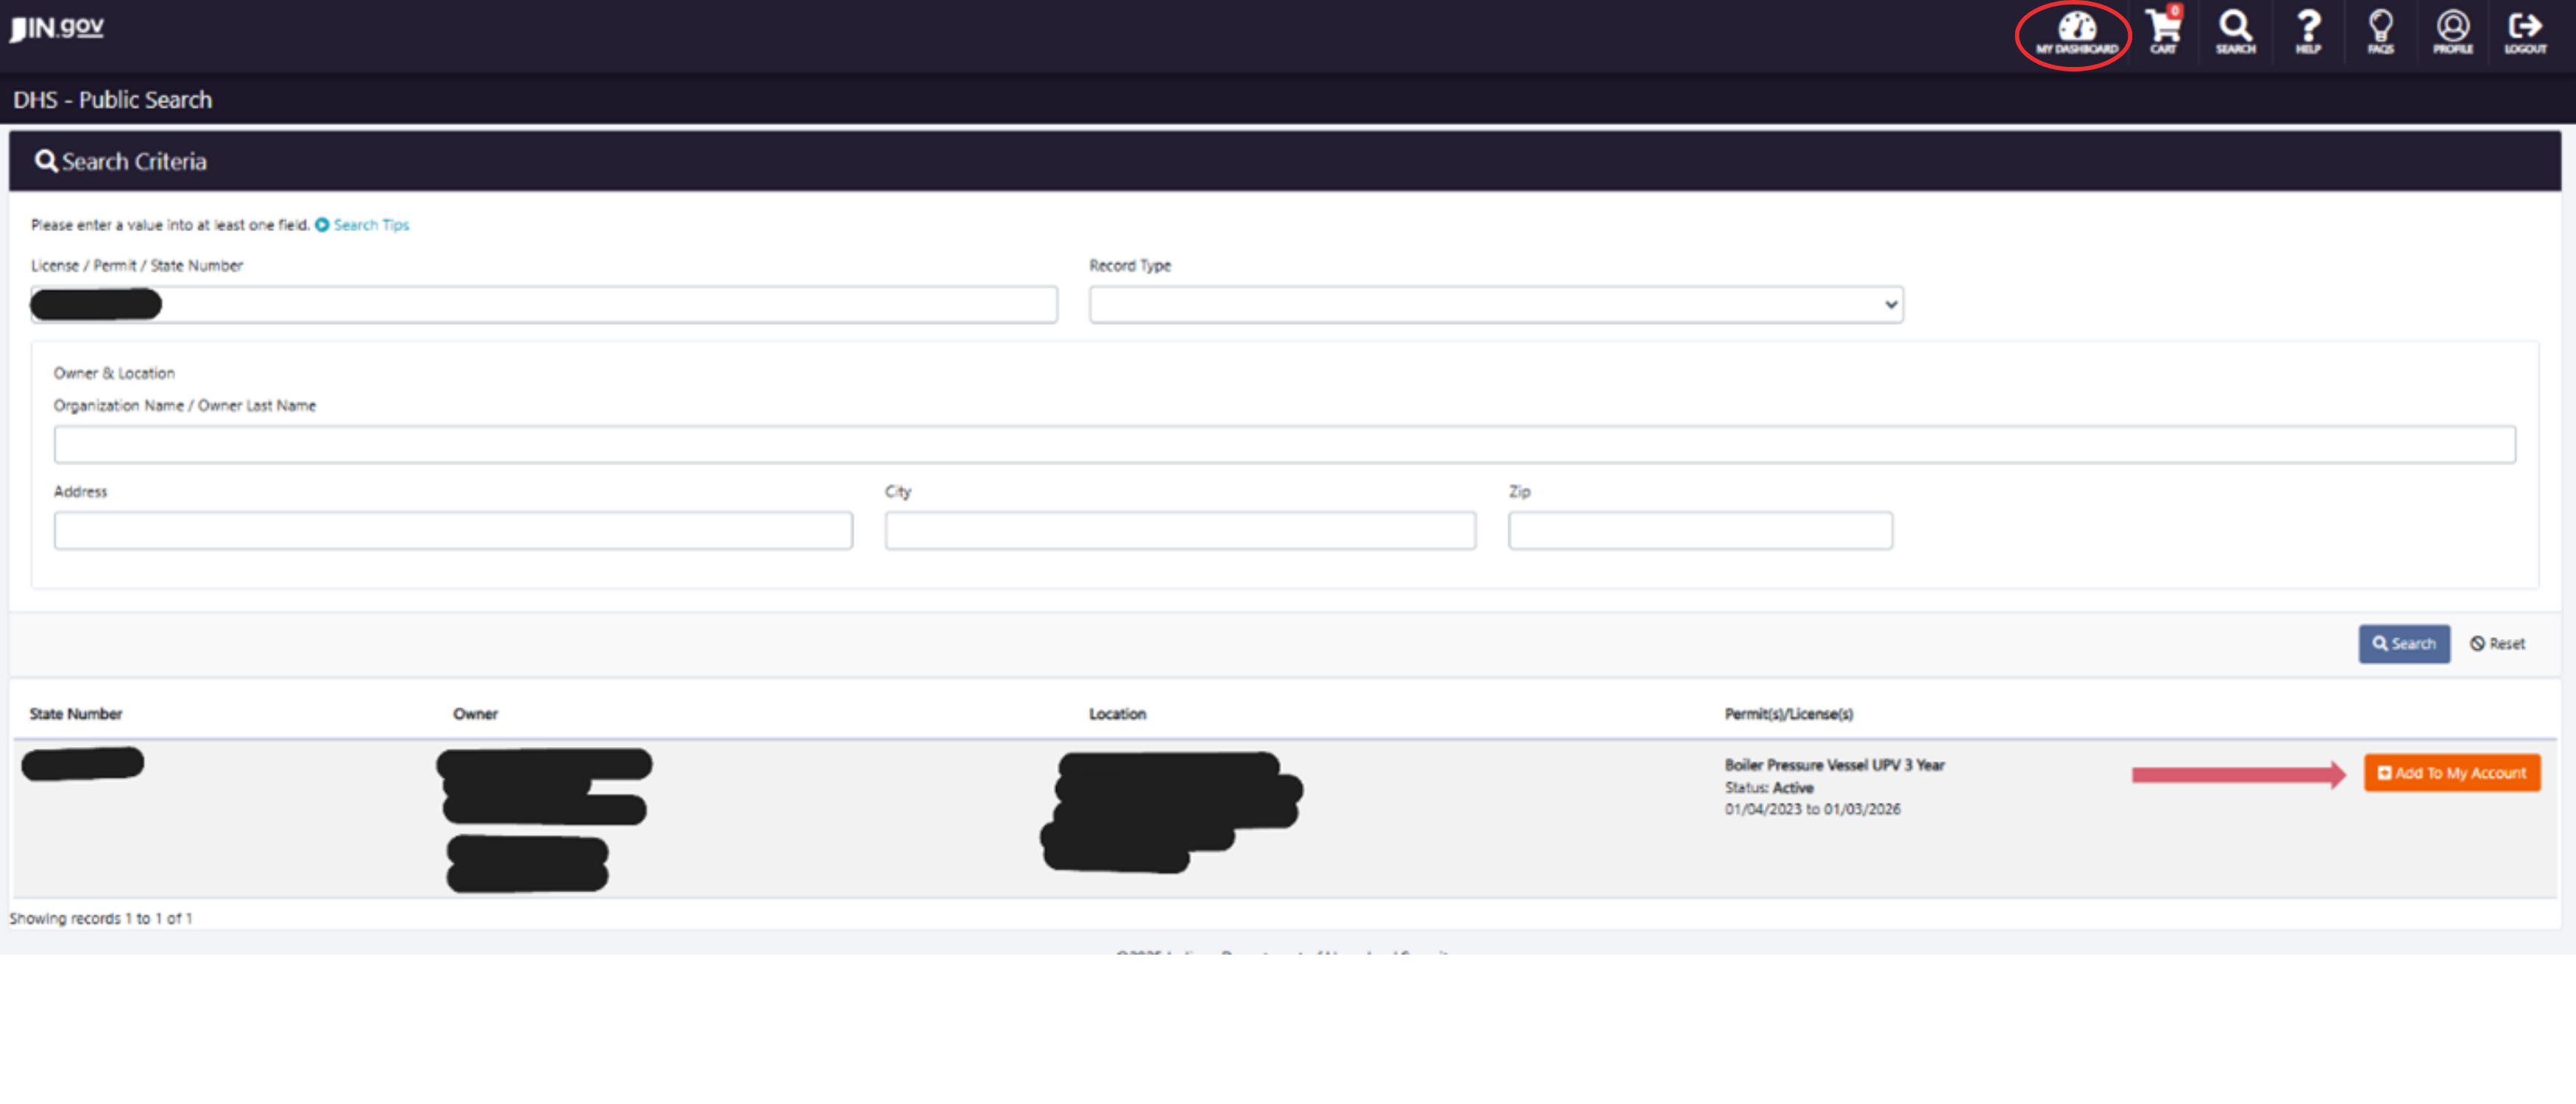
Step 3: In the upper right-hand corner there is a spyglass labeled search, left click on it

Step 4: Enter the State Permit Tag number (state number) and hit search. The state number is the blue tag number on your device that starts with IN or BP. Do not add the IN to the number when searching. Just type the numbered portion it will be a six-digit number. Do not fill anything else out on this page. (see Below). After you hit search a device will populate at the bottom. If it is the correct device click on add to my account in the bottom right
To see the device that was just added click on my dashboard
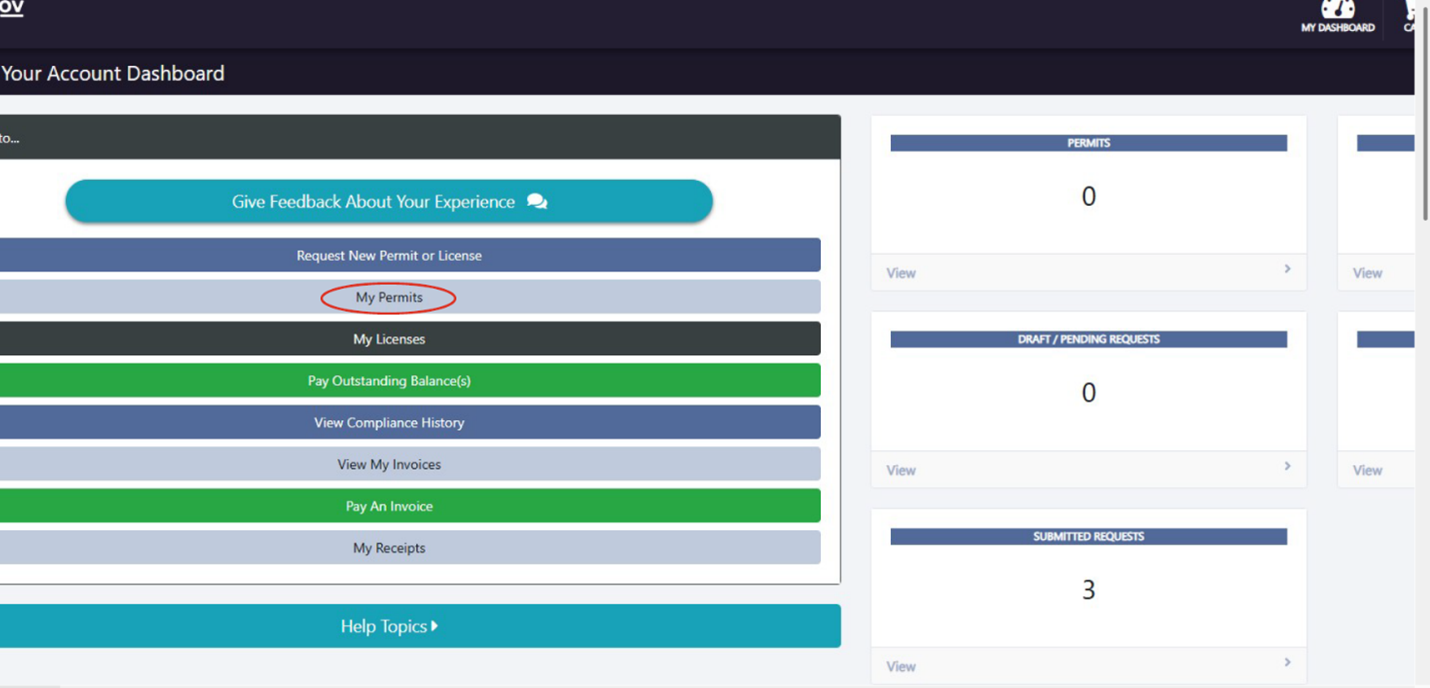
Click My Permits on the left side
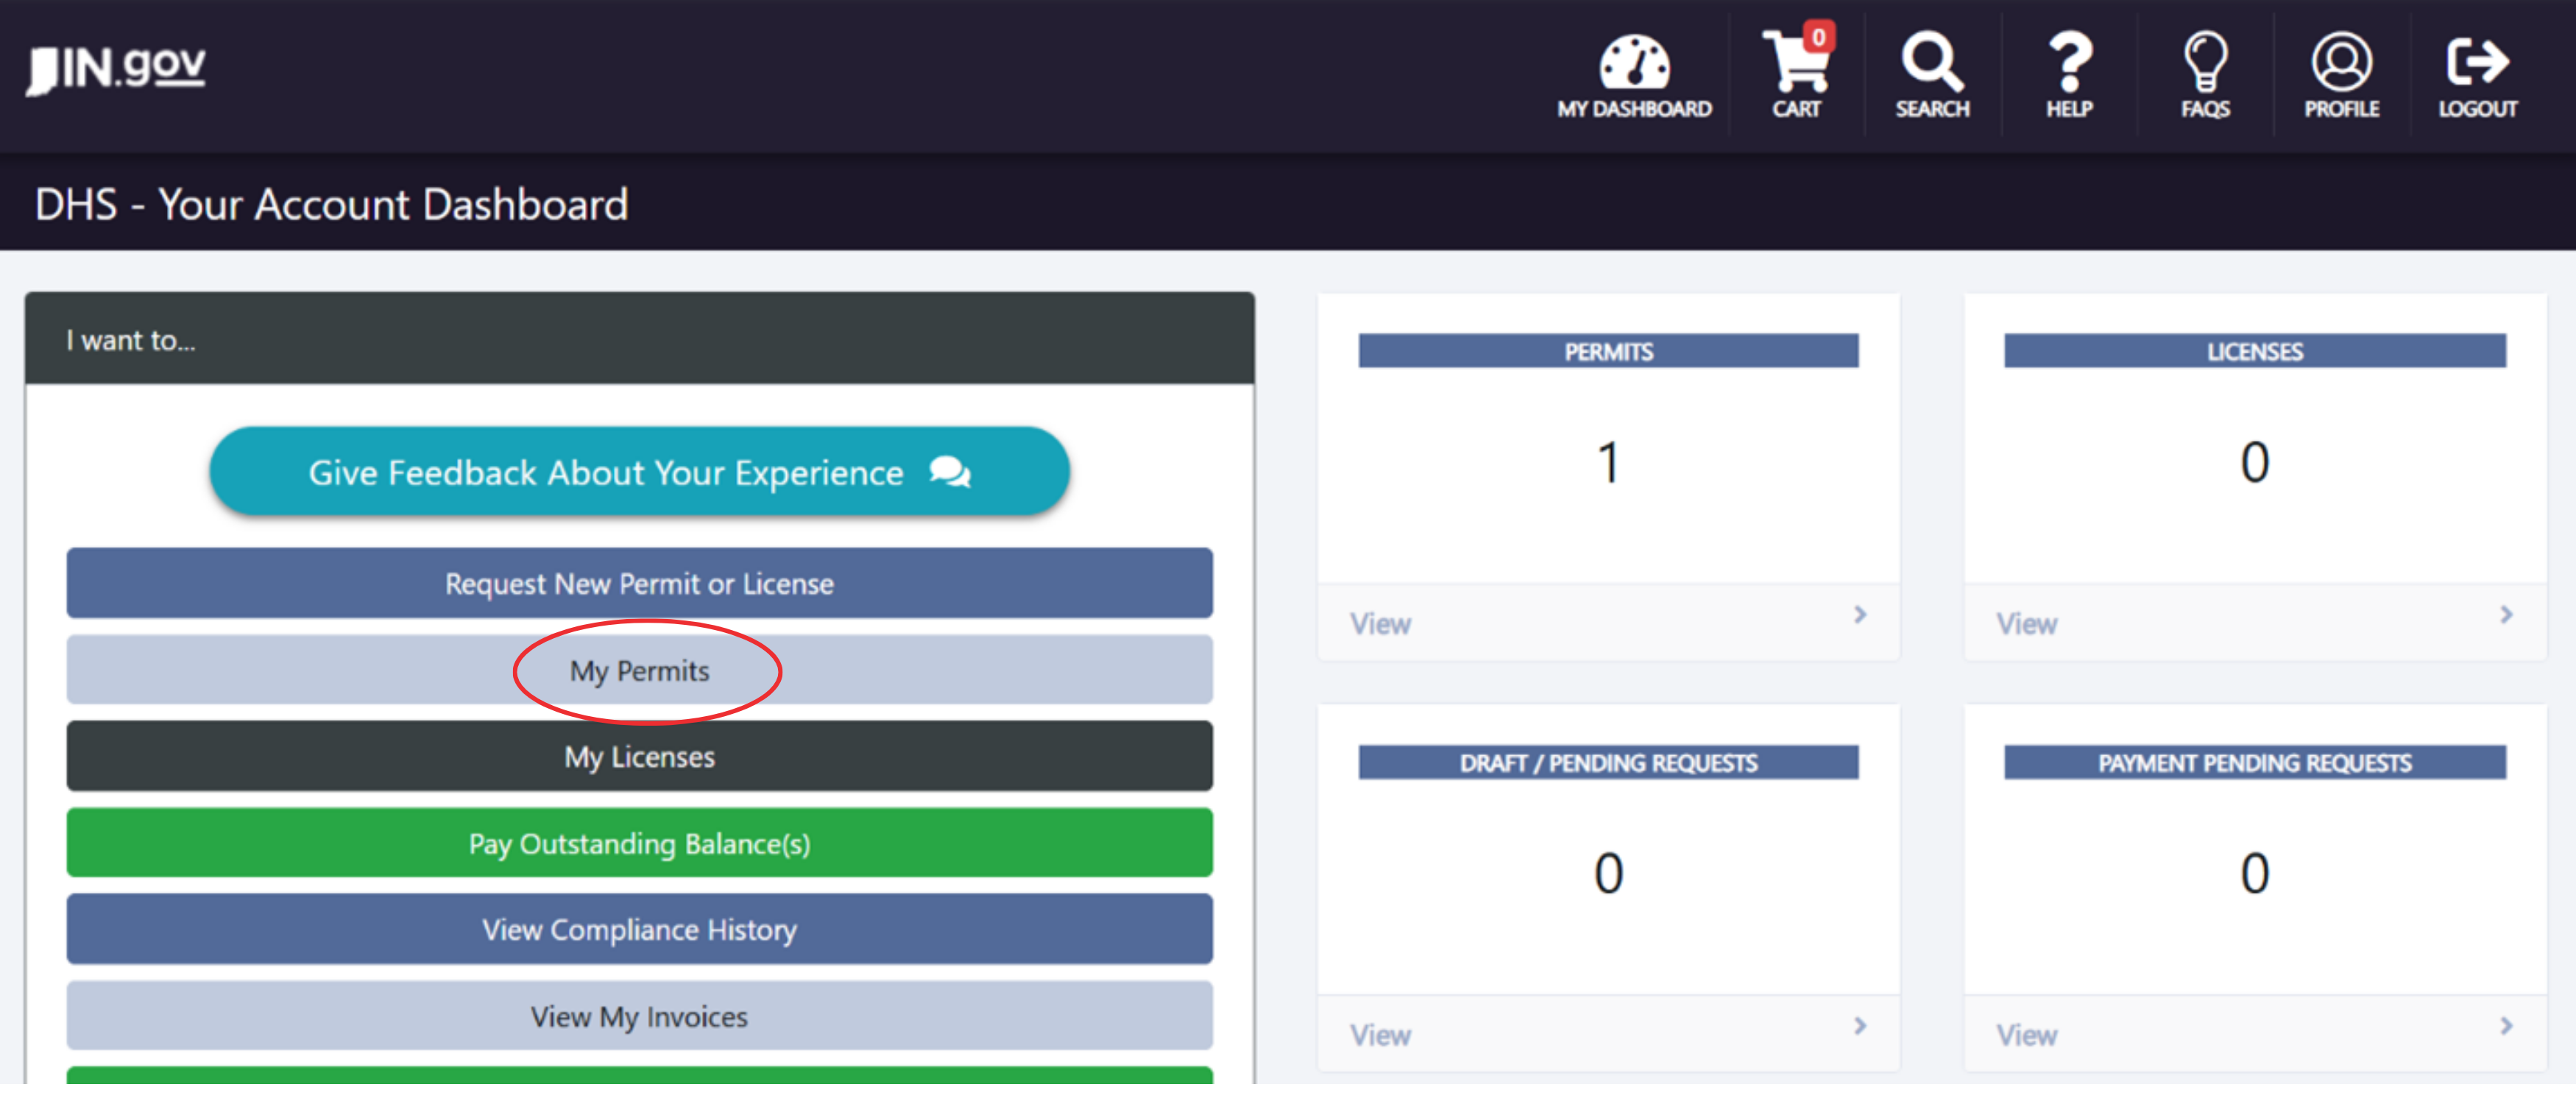
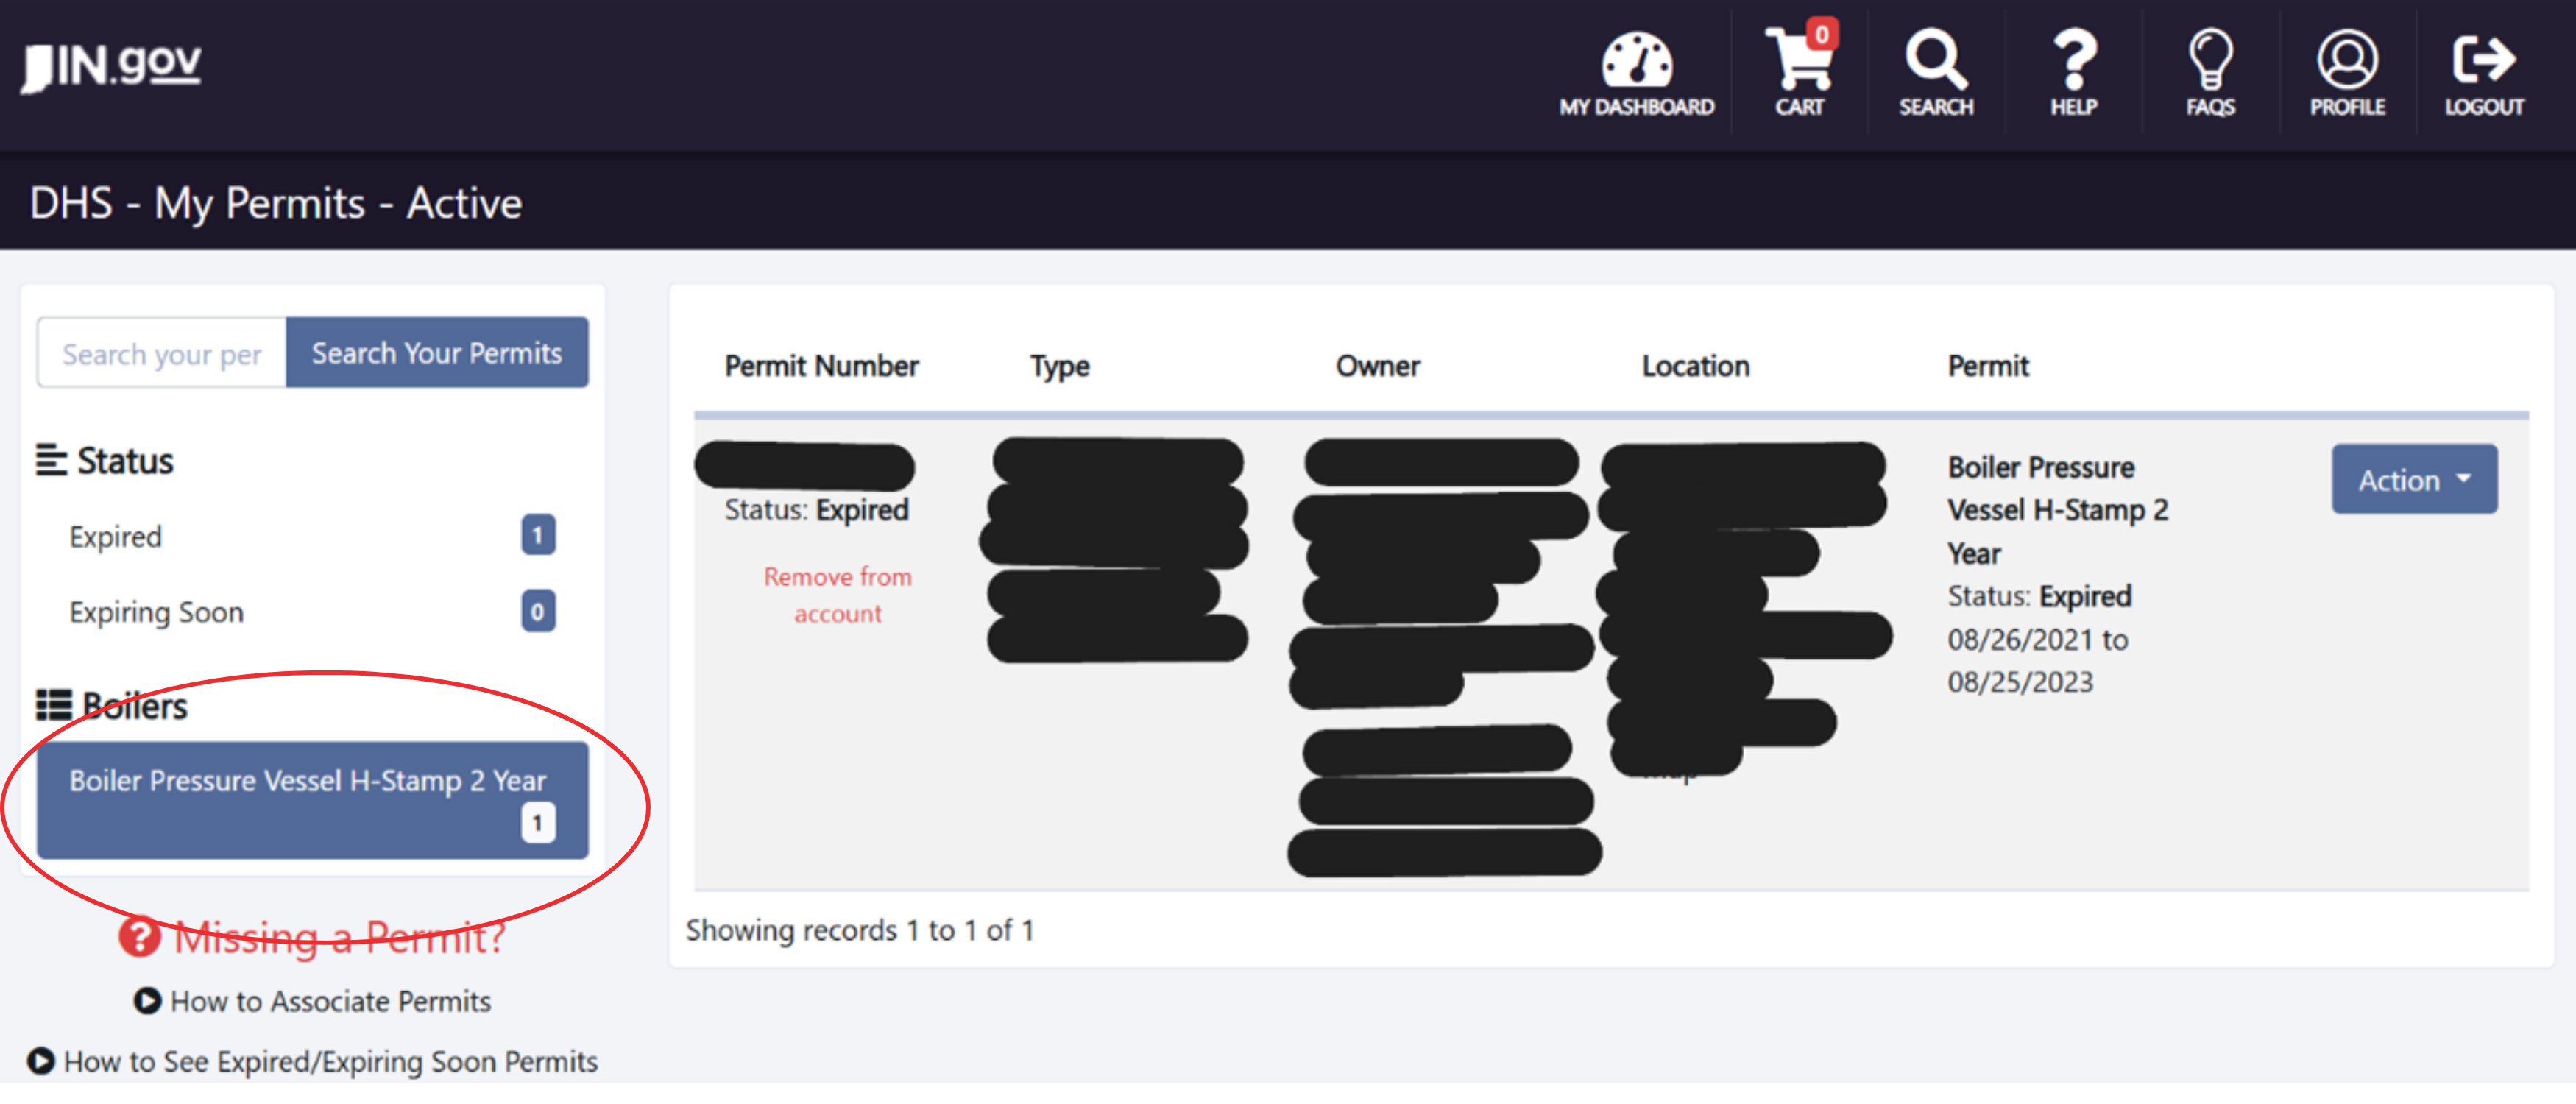
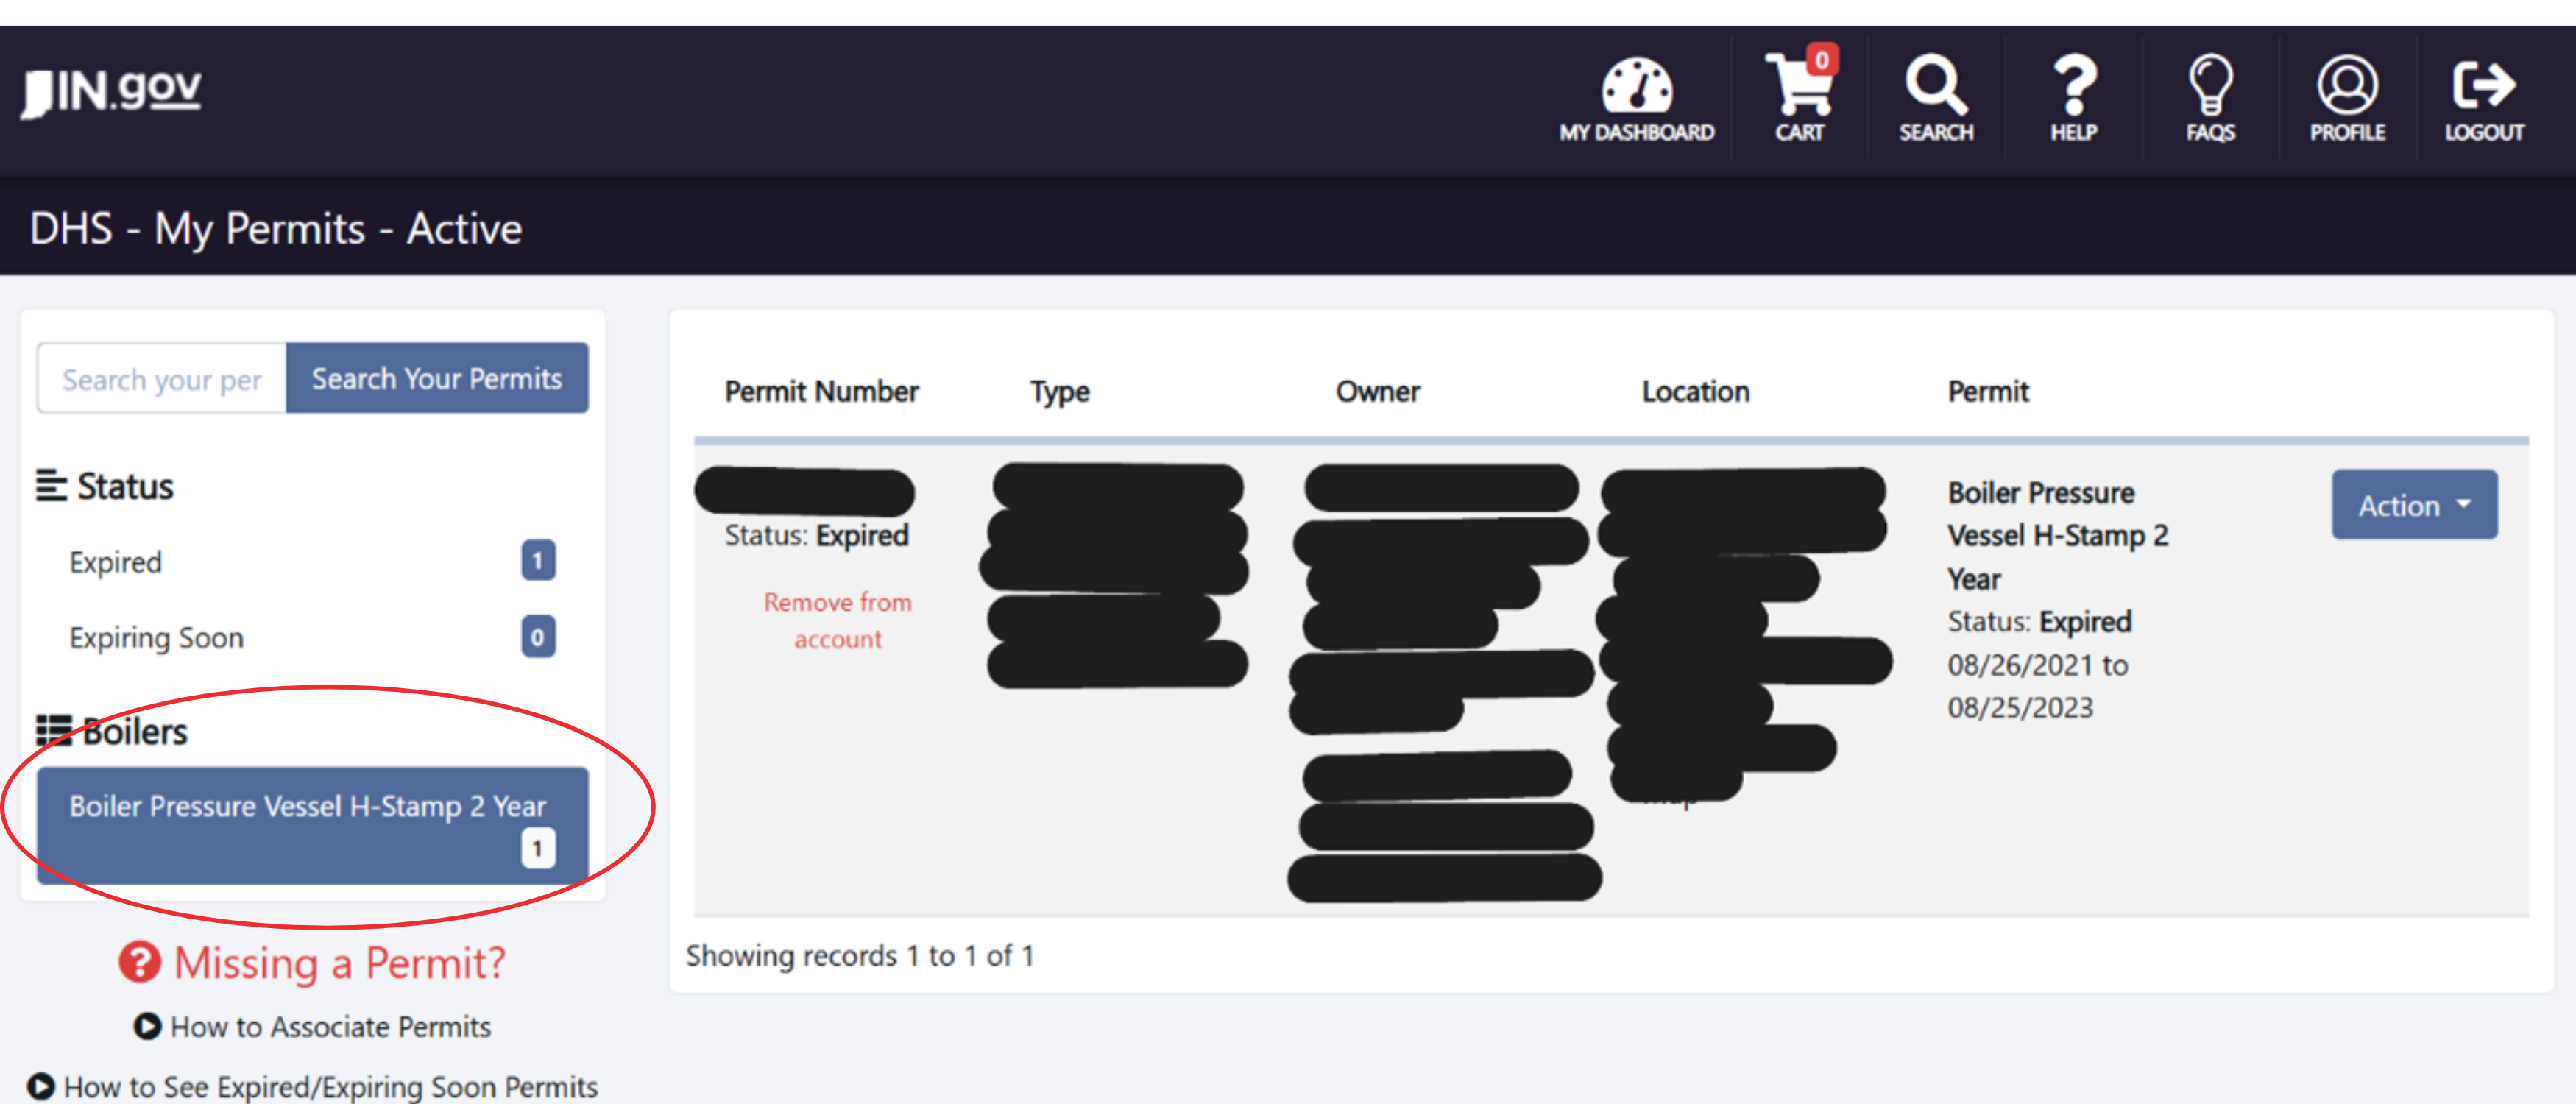
After clicking My Permits you will be directed to the screen seen below; left click
to highlight Boiler Pressure Vessel highlighted in blue on the screenshot here.
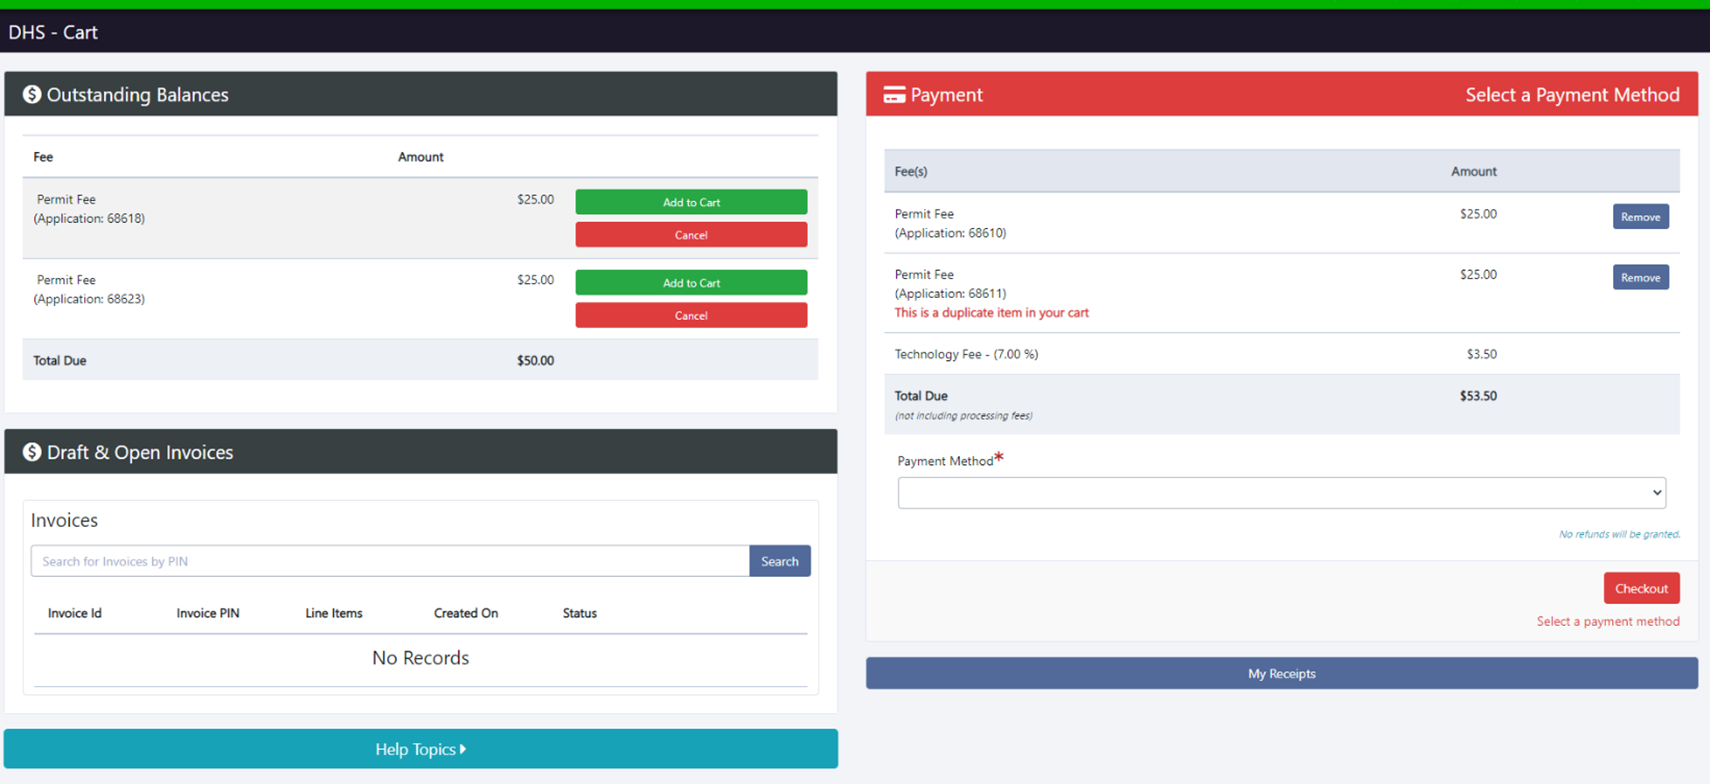
- How to Create an Invoice
Step 1: Login - This will take you to the main dashboard page pictured below
Step 2: Click on Cart.
**Hint** Will need to have items ready to pay in cart to create invoice.

There must be at least 1 item on the payment side to create an invoice.
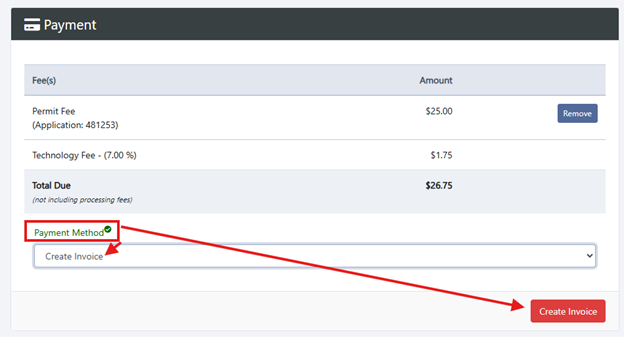
Step 3: Under Payment Method choose Create Invoice from the drop down. Then, click Create Invoice.
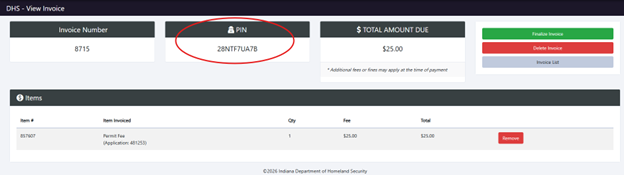
The Pin number may be sent to the department that is going to be making the payment or the invoice may be printed (see below on how to print).
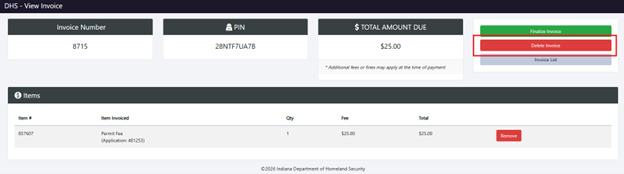
Step 4: When you are ready to create the invoice. Click on Finalize Invoice.
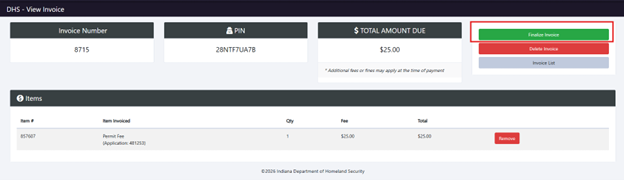
If for some reason the invoice needs to be deleted. Click on Delete Invoice.
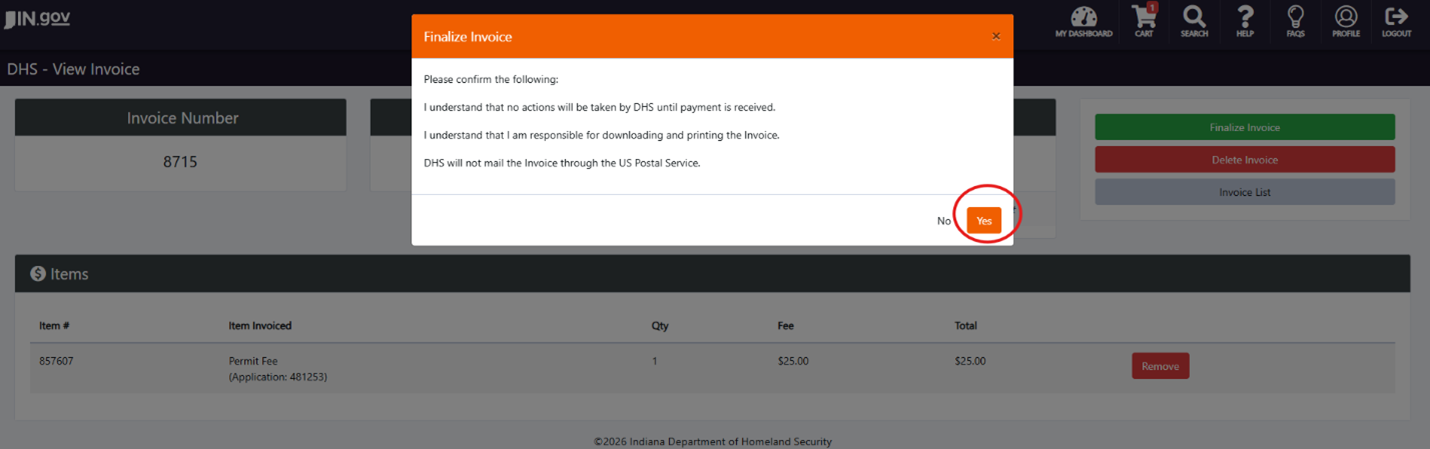
Step 5: Finalize Invoice notice will pop up. Click Yes to continue. If something needs to be changed or to Delete an Invoice. Click No.
If the invoice needs to be printed. Click Print Invoice. Depending on your computer settings the PDF will open then you will need to save it or it will pop up at the bottom left-hand corner, click on the attachment. Then a printable invoice can be saved or printed.
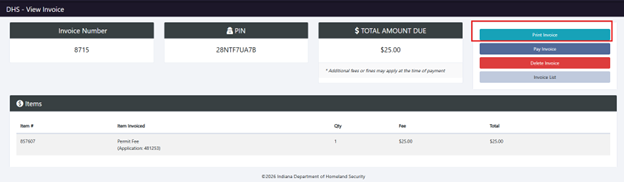
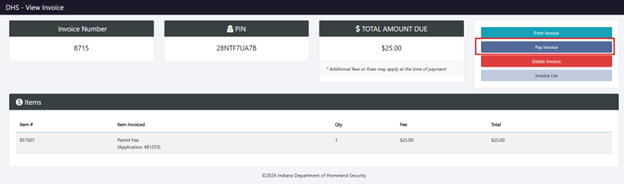
If the invoice is ready to be paid. Click on Pay Invoice.
Click Action. Here you can choose an invoice to be viewed, Paid, or Deleted. Click Pay to continue to pay the invoice. Next click on the Cart to verify and proceed to check out.
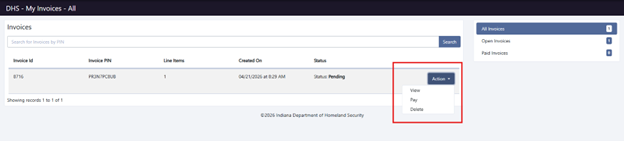
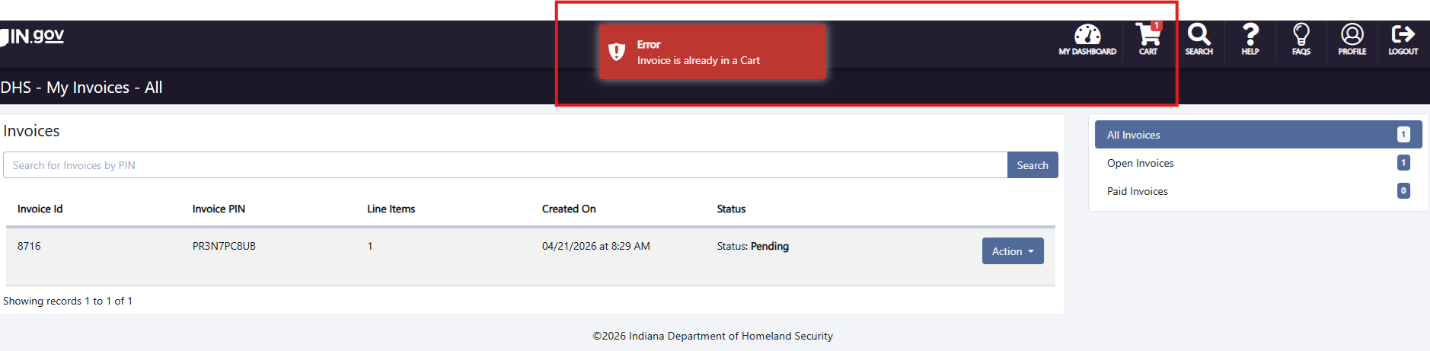
Click Pay to continue to pay the invoice once you do this a message will appear “error”. Next click on the Cart to verify and proceed to check out.
If several invoices have been created, you can pay for one at a time or pay for several. Click on Action, then select Pay for each invoice added to your account.
When payment has been successfully completed. The invoice will no longer show up in the Draft & Open Invoices due.
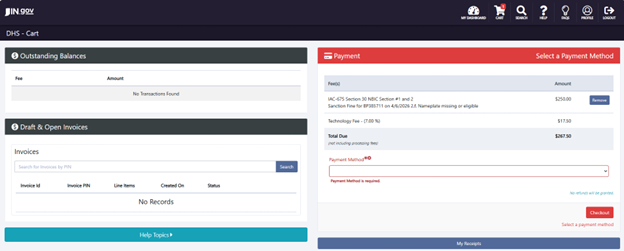
- How to Pay for a Sanction
Step 1: Login - This will take you to the main dashboard page pictured below
Step 2: In the upper right hand corner there is a cart, left click on it. (Even though the cart may read 0 the sanction is in there)
Step 3: Under outstanding balances, select Add to Cart
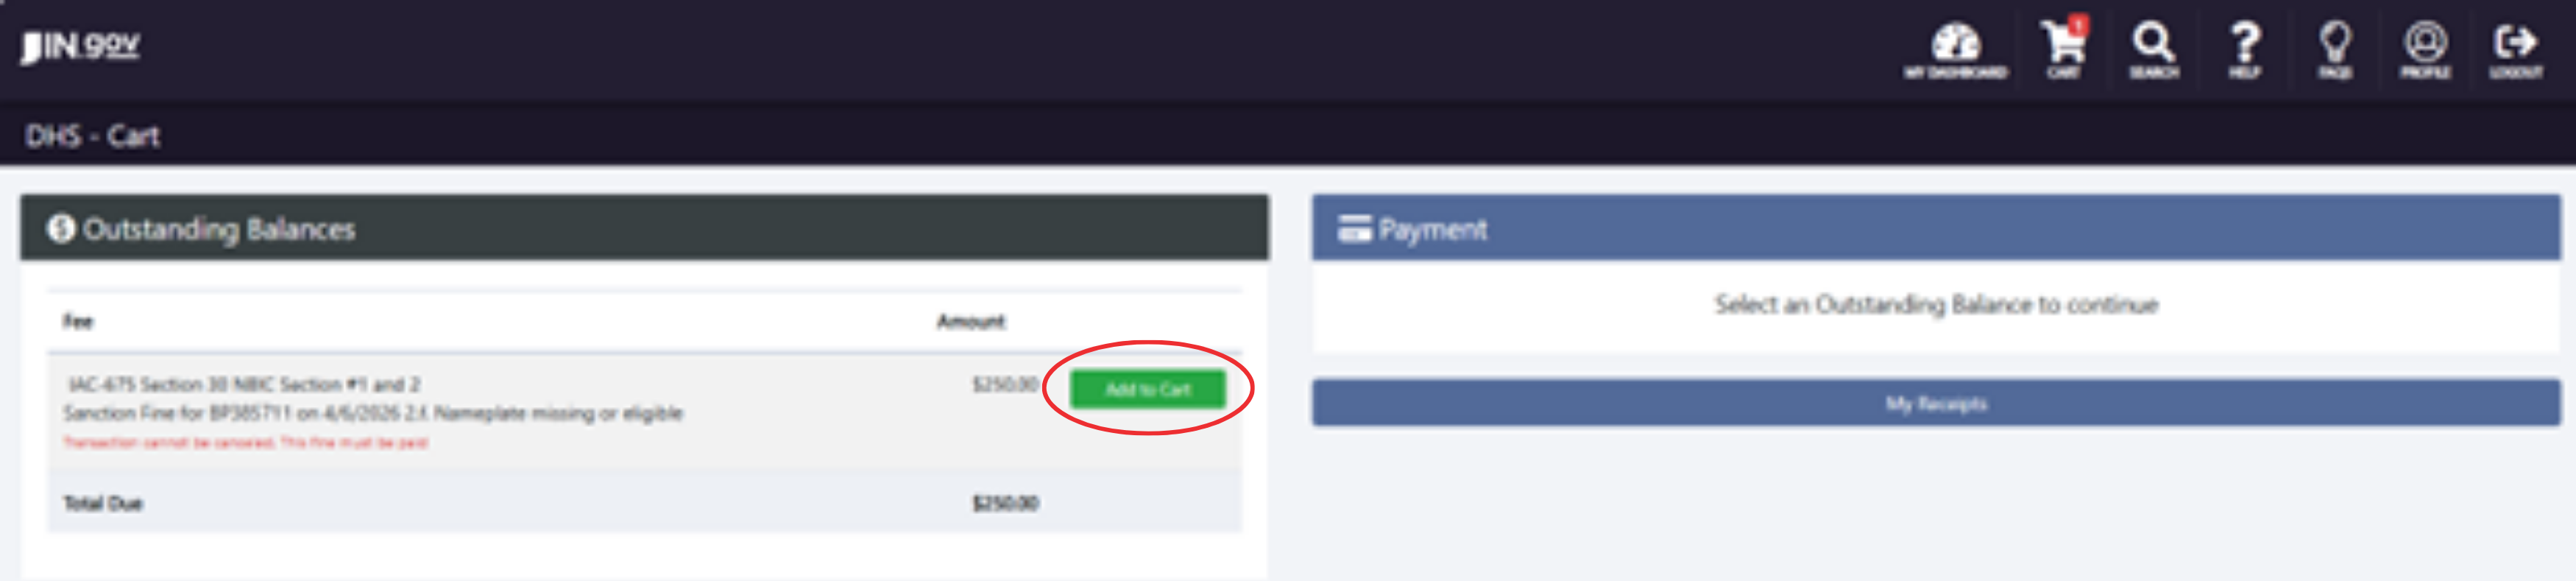
Step 4: Add the Method of payment and select checkout
- How to Print a Permit
Step 1: Open up the PSP dashboard and on the left side select my permits
Step 2: In the My Permits screen below boilers on the left select the stamp, the device information will populate on the right
Step 3: Finally select the action tab on the device you would like to print the permit on and then select download PDF. Note the permit status will need to be active before printing a valid permit
- How to Renew a Permit
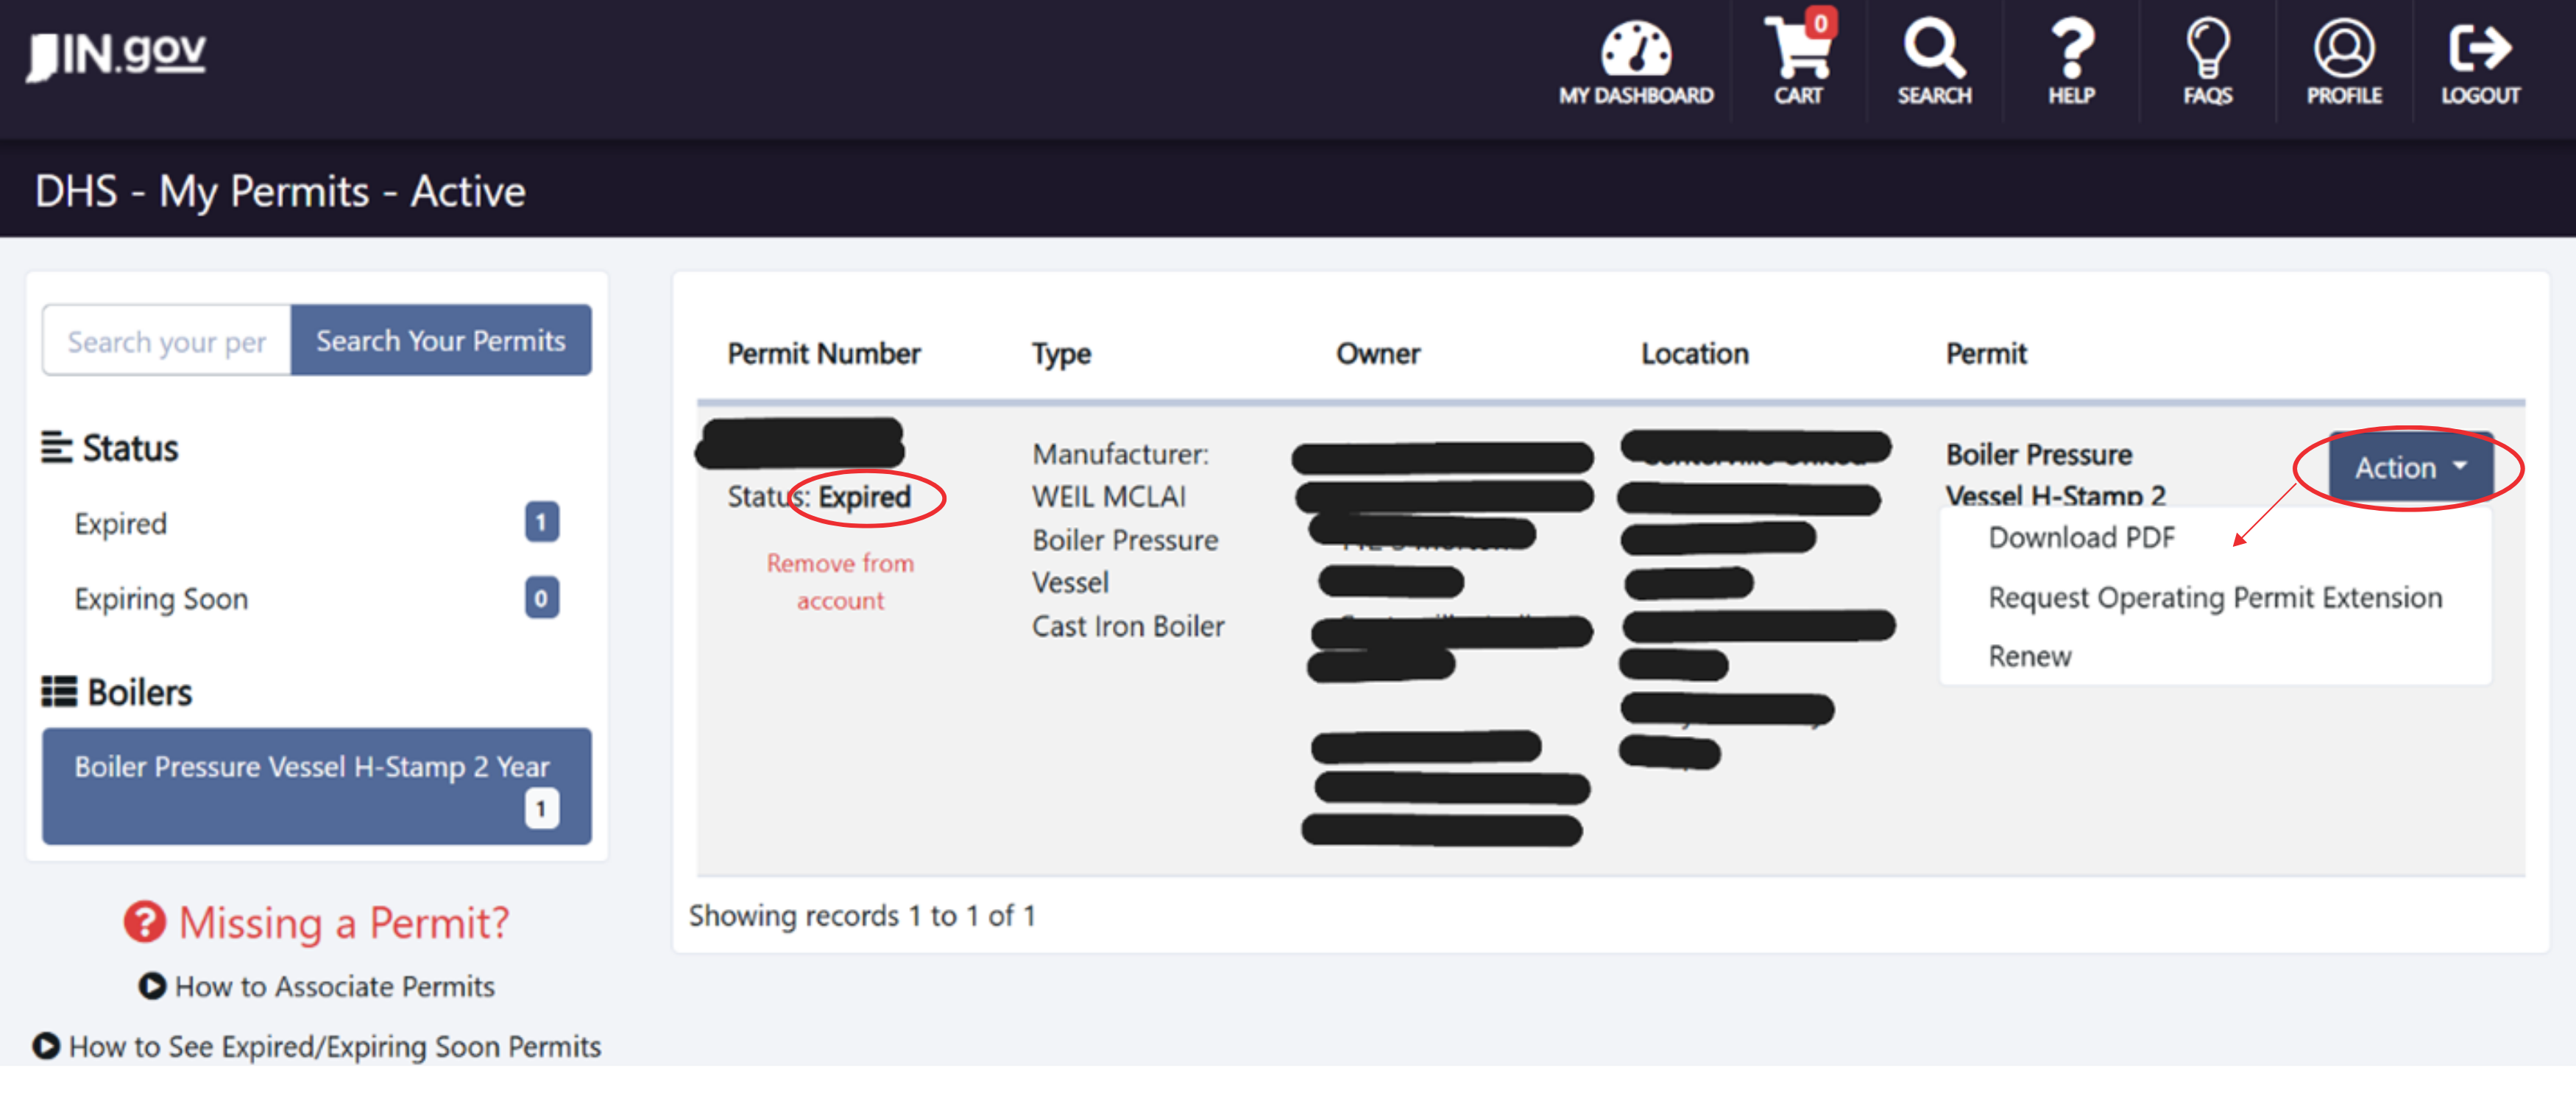
Step 1: On the main dashboard screen in your account, select My Permits on the left side of the screen

Step 2: After clicking My Permits, you will be directed to the screen seen below; left click to highlight, Boiler Pressure Vessel, highlighted in blue on the screenshot here.
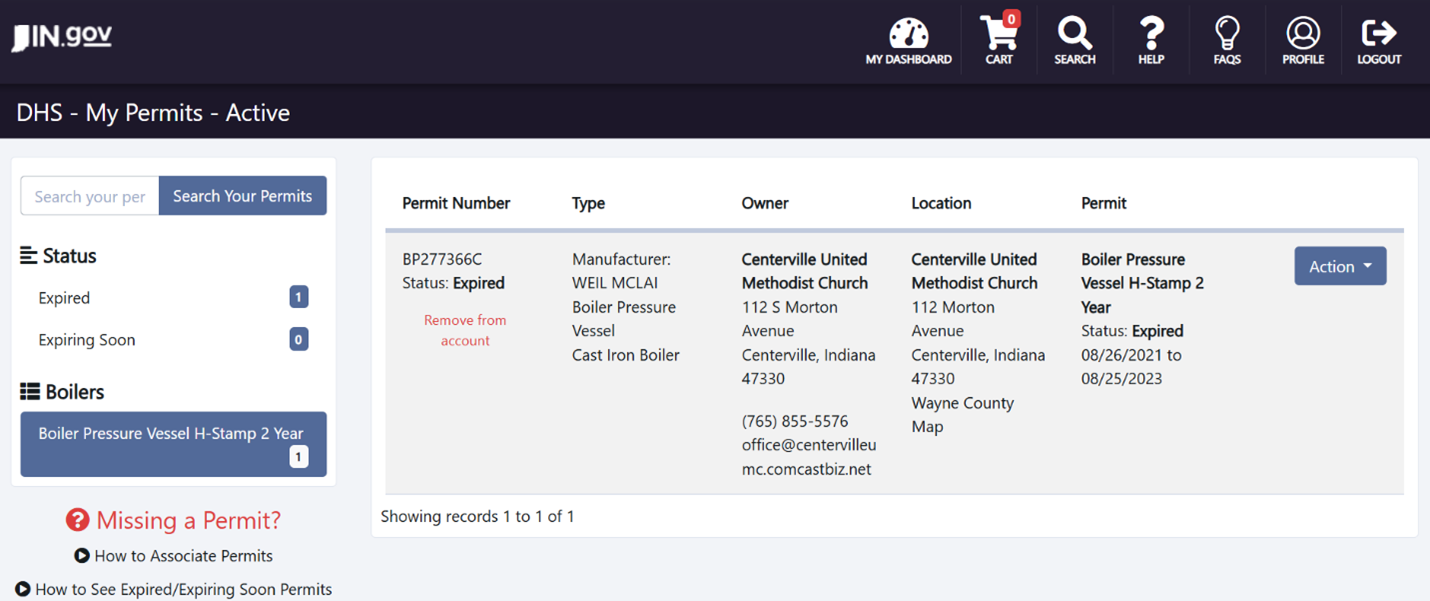
Step 3: After selecting boiler pressure vessel from the previous step the associated devices will appear on the right side of the screen. Next you must select Action on the device you would like to renew and then select renew (in this case there is only 1 device to choose from your specific account may have multiple).
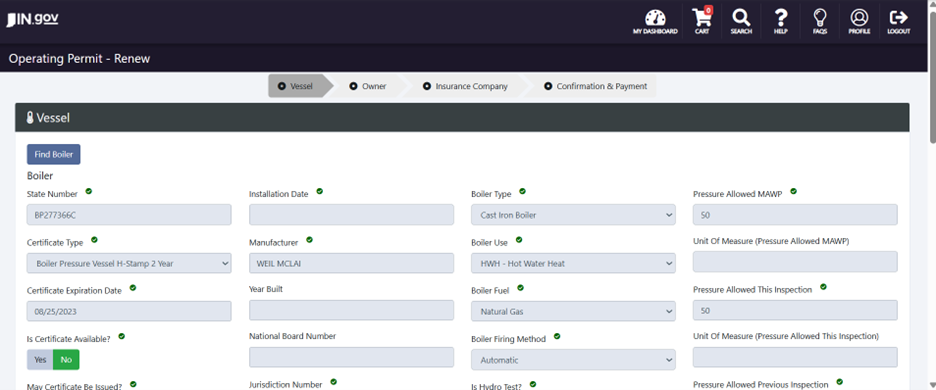
Step 4: After Selecting Renew it will take you to the screen below (the title of this page is Operating Permit -Renew). This page should already have been filled out by the inspector who completed your inspection. All you should do is hit next at the bottom right of the screen. Unless there is a * or red X next to any of the fields on the page. That means they would need to be filled out. Repeat this process on the next page (Owner) updating any inaccurate information. Then hit next. Repeat this process on the next page (Insurance Company) updating any inaccurate information. Then hit next at the bottom right of the screen. If the field is greyed out you will not be able to change anything.
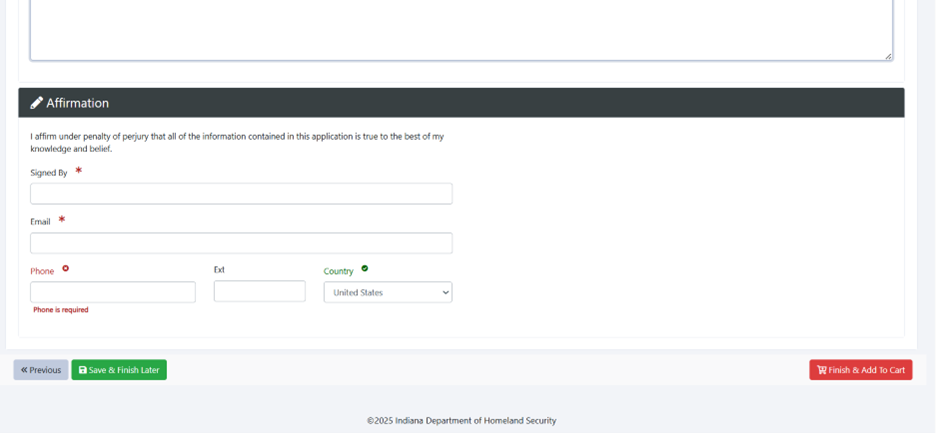
Step 5: Confirmation & Payment: Verify All information is accurate to the best of your knowledge. Scroll to the bottom the screen as seen below and fill out everything with an * or red x then select finish & add to cart at the bottom right of this page as seen below
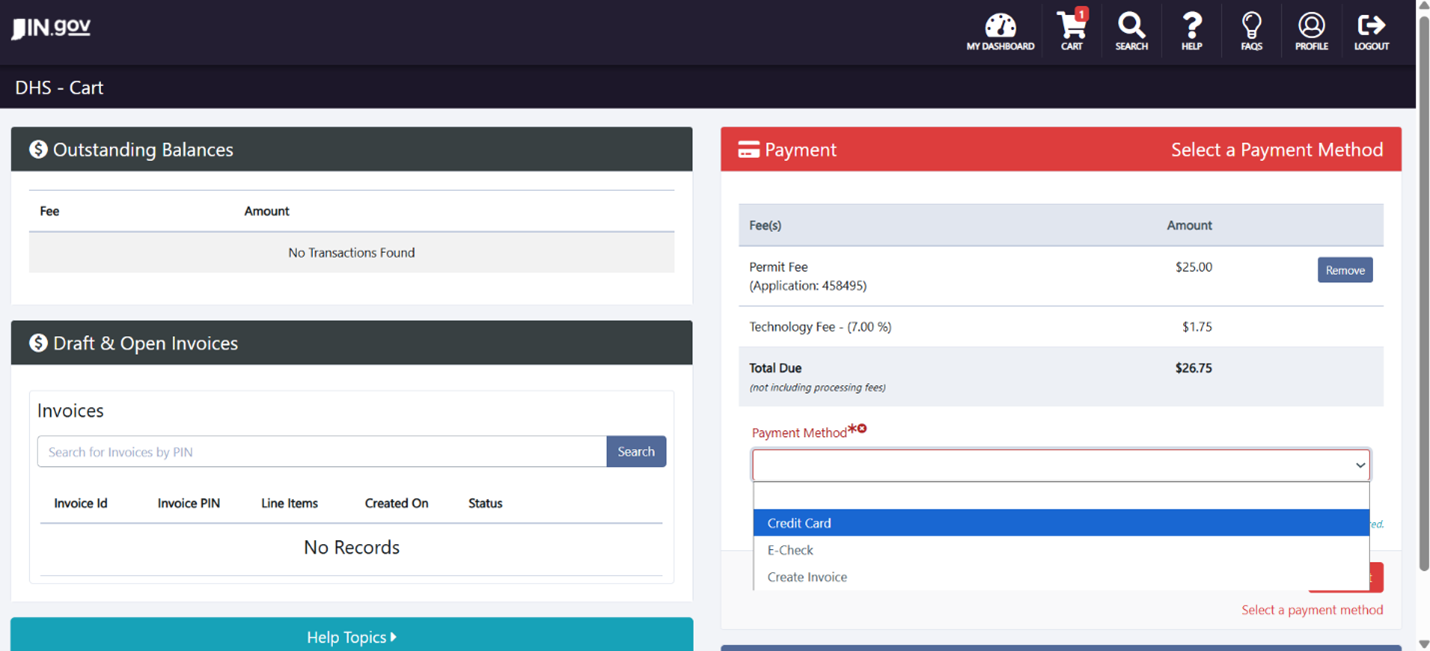
Step 6: After hitting finish & add to cart you will automatically be directed to the cart seen below. Select your payment method (Credit Card) from the dropdown then select Checkout in the red box below the payment method
*Note the System only accepts Visa and Mastercard
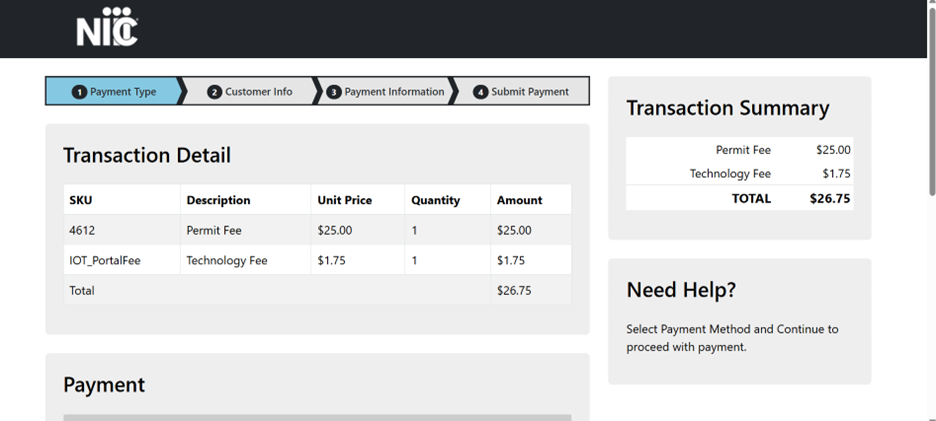
Step 7: After selecting checkout, you will be directed to fill out and process payment by following the prompts on the screen starting on the page seen below
- How to Enter an Inspection (Licensed Boiler Inspectors Only)
View the document below for a step-by-step tutorial on entering inspections into the Public Safety Portal. The example used is for a boilers and pressure vessels inspection.
Still Have Questions?
If you have technical difficulties or questions related to your permit or license, please contact the relevant section below:
Boilers and Pressure Vessels Section
Code Enforcement Section (fireworks permits, amusement/entertainment permits, fire/building code violations)